User Guide
This guide covers everything you need to know to set up and use Solido, from initial setup through to ongoing management.
Getting Started
Creating Your Account
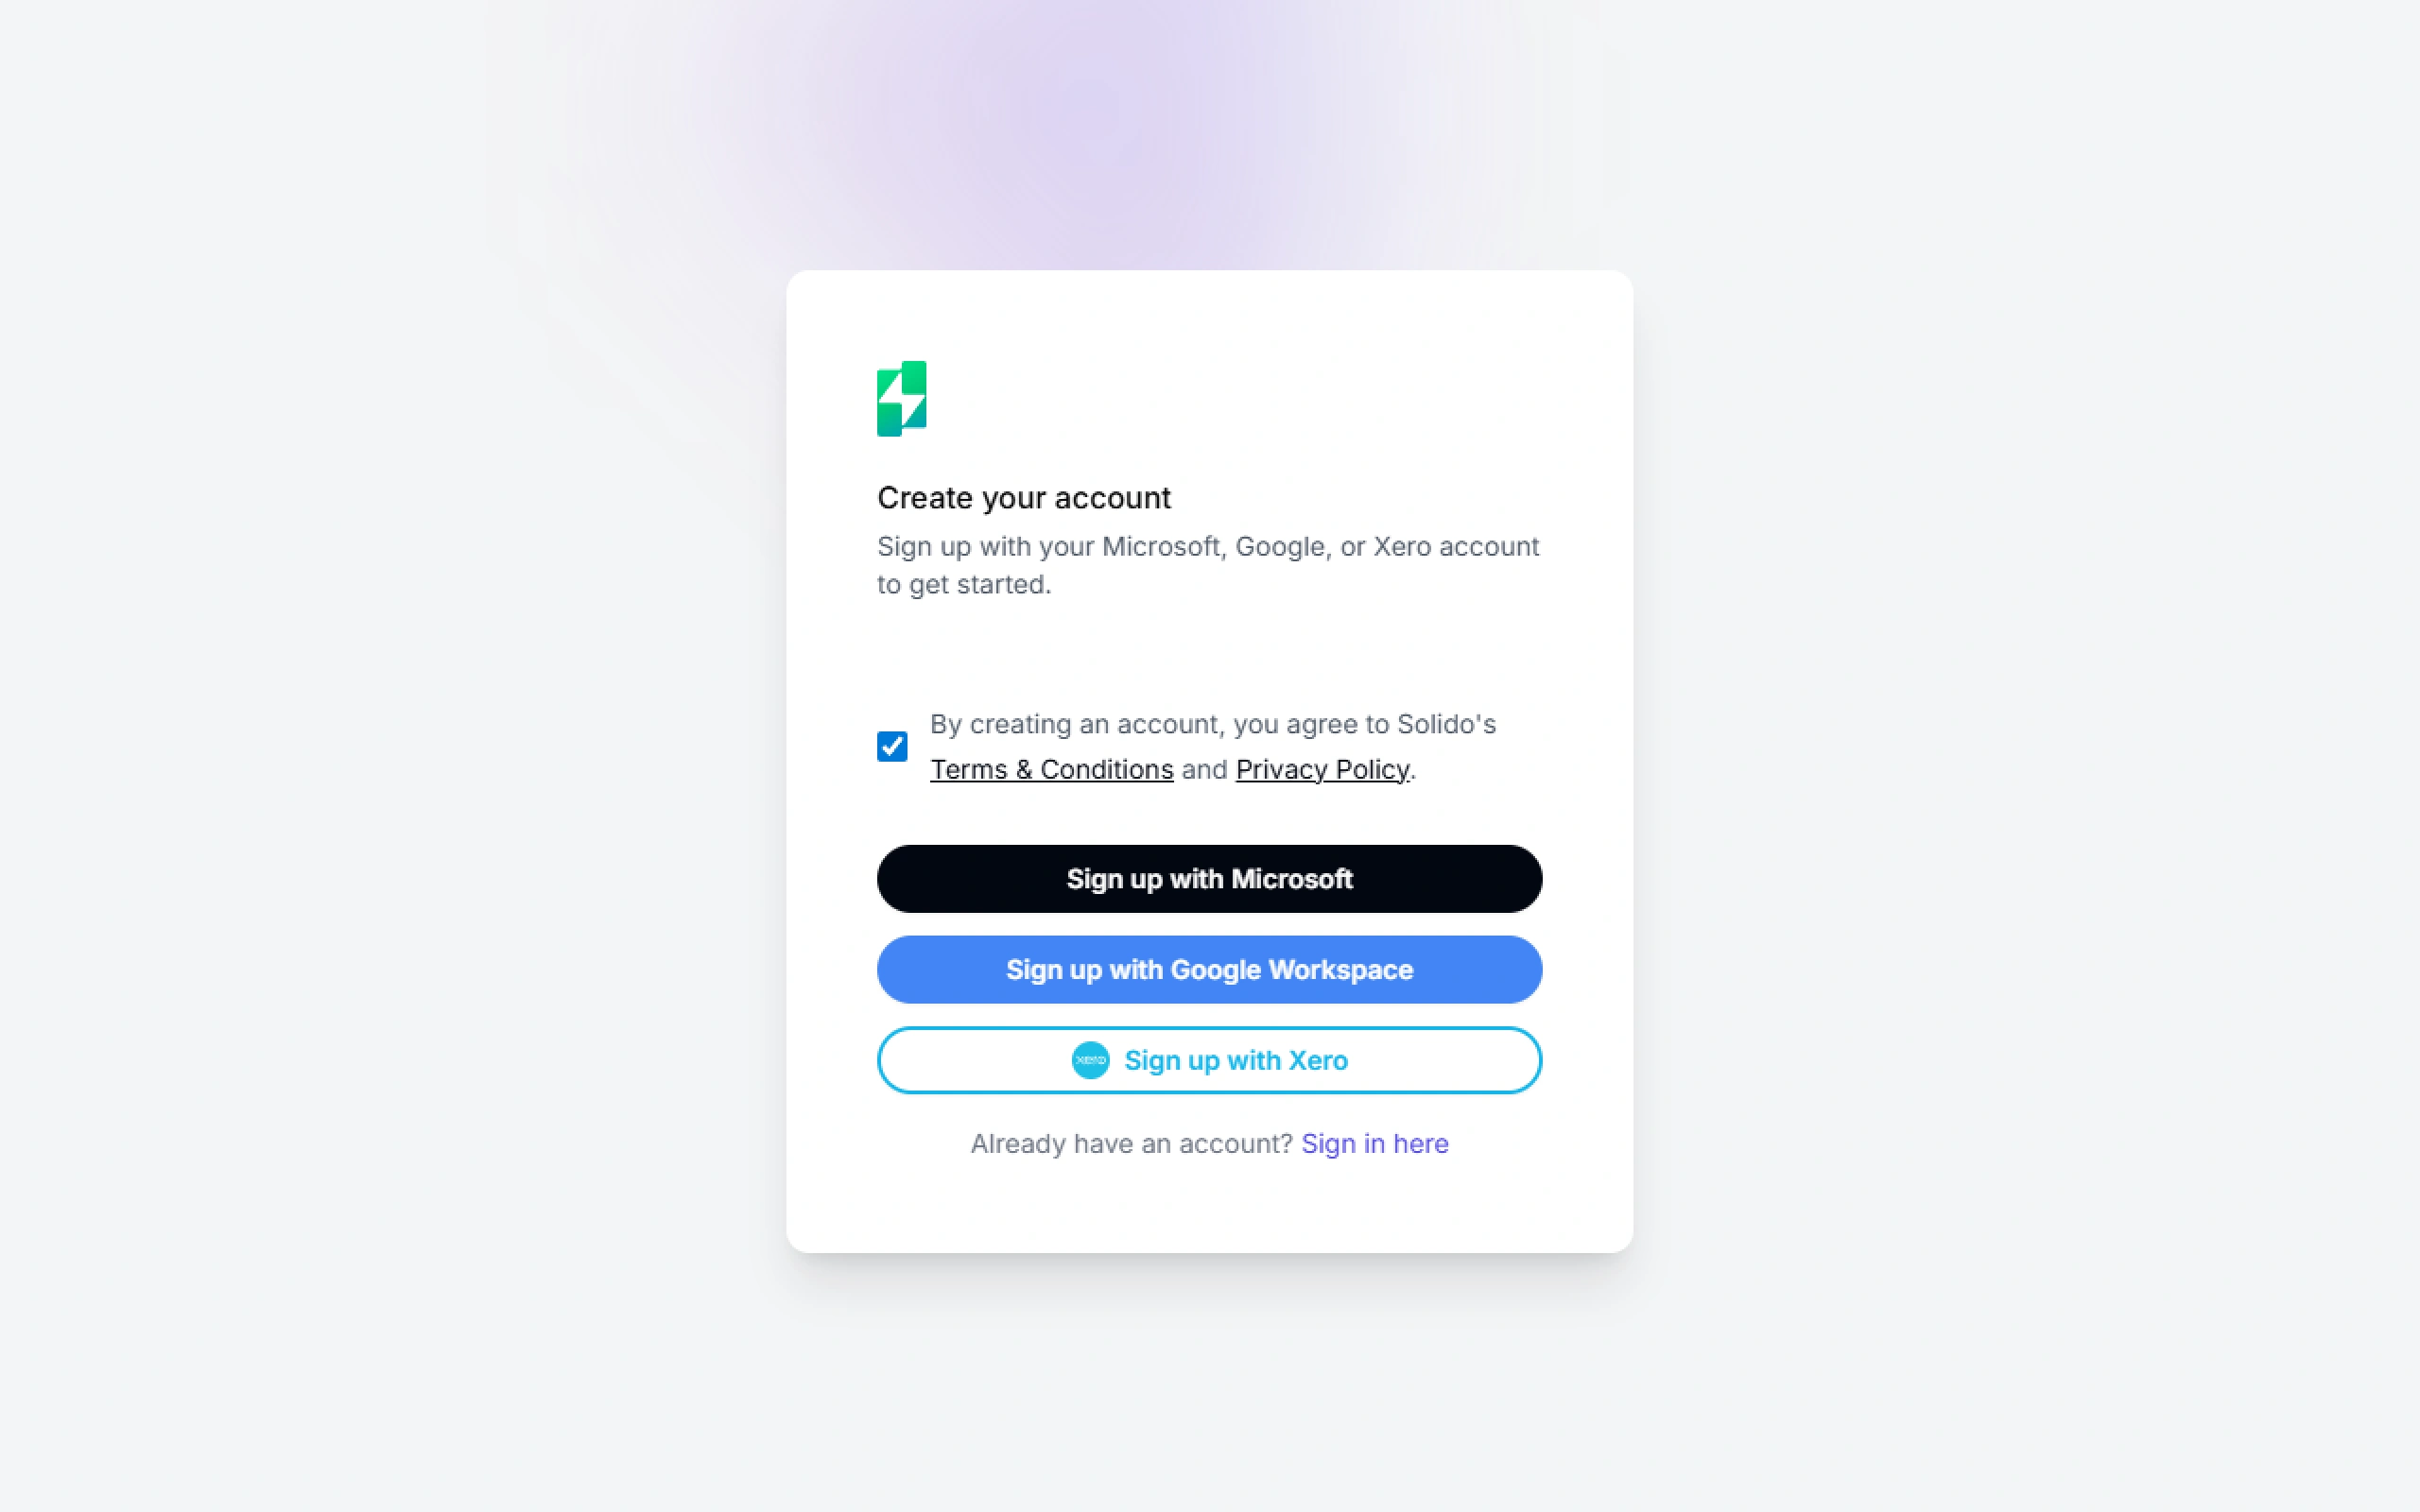
Go to app.solido.ai and click Create an Account.
Choose how you want to sign up:
- Microsoft 365 — Sign in with your Microsoft account
- Google Workspace — Sign in with your Google account
- Xero — Sign in with your Xero account
Grant Solido permission to access your chosen account.
Your account will be created and you will be taken to the onboarding process.
Onboarding
Our onboarding flow guides you through setup in six steps. You can complete this in about 10 minutes.
Step 1: Create Your Workspace
A workspace represents a single business entity. Give it a name (usually your business name).
If you manage multiple businesses, you can create additional workspaces later.
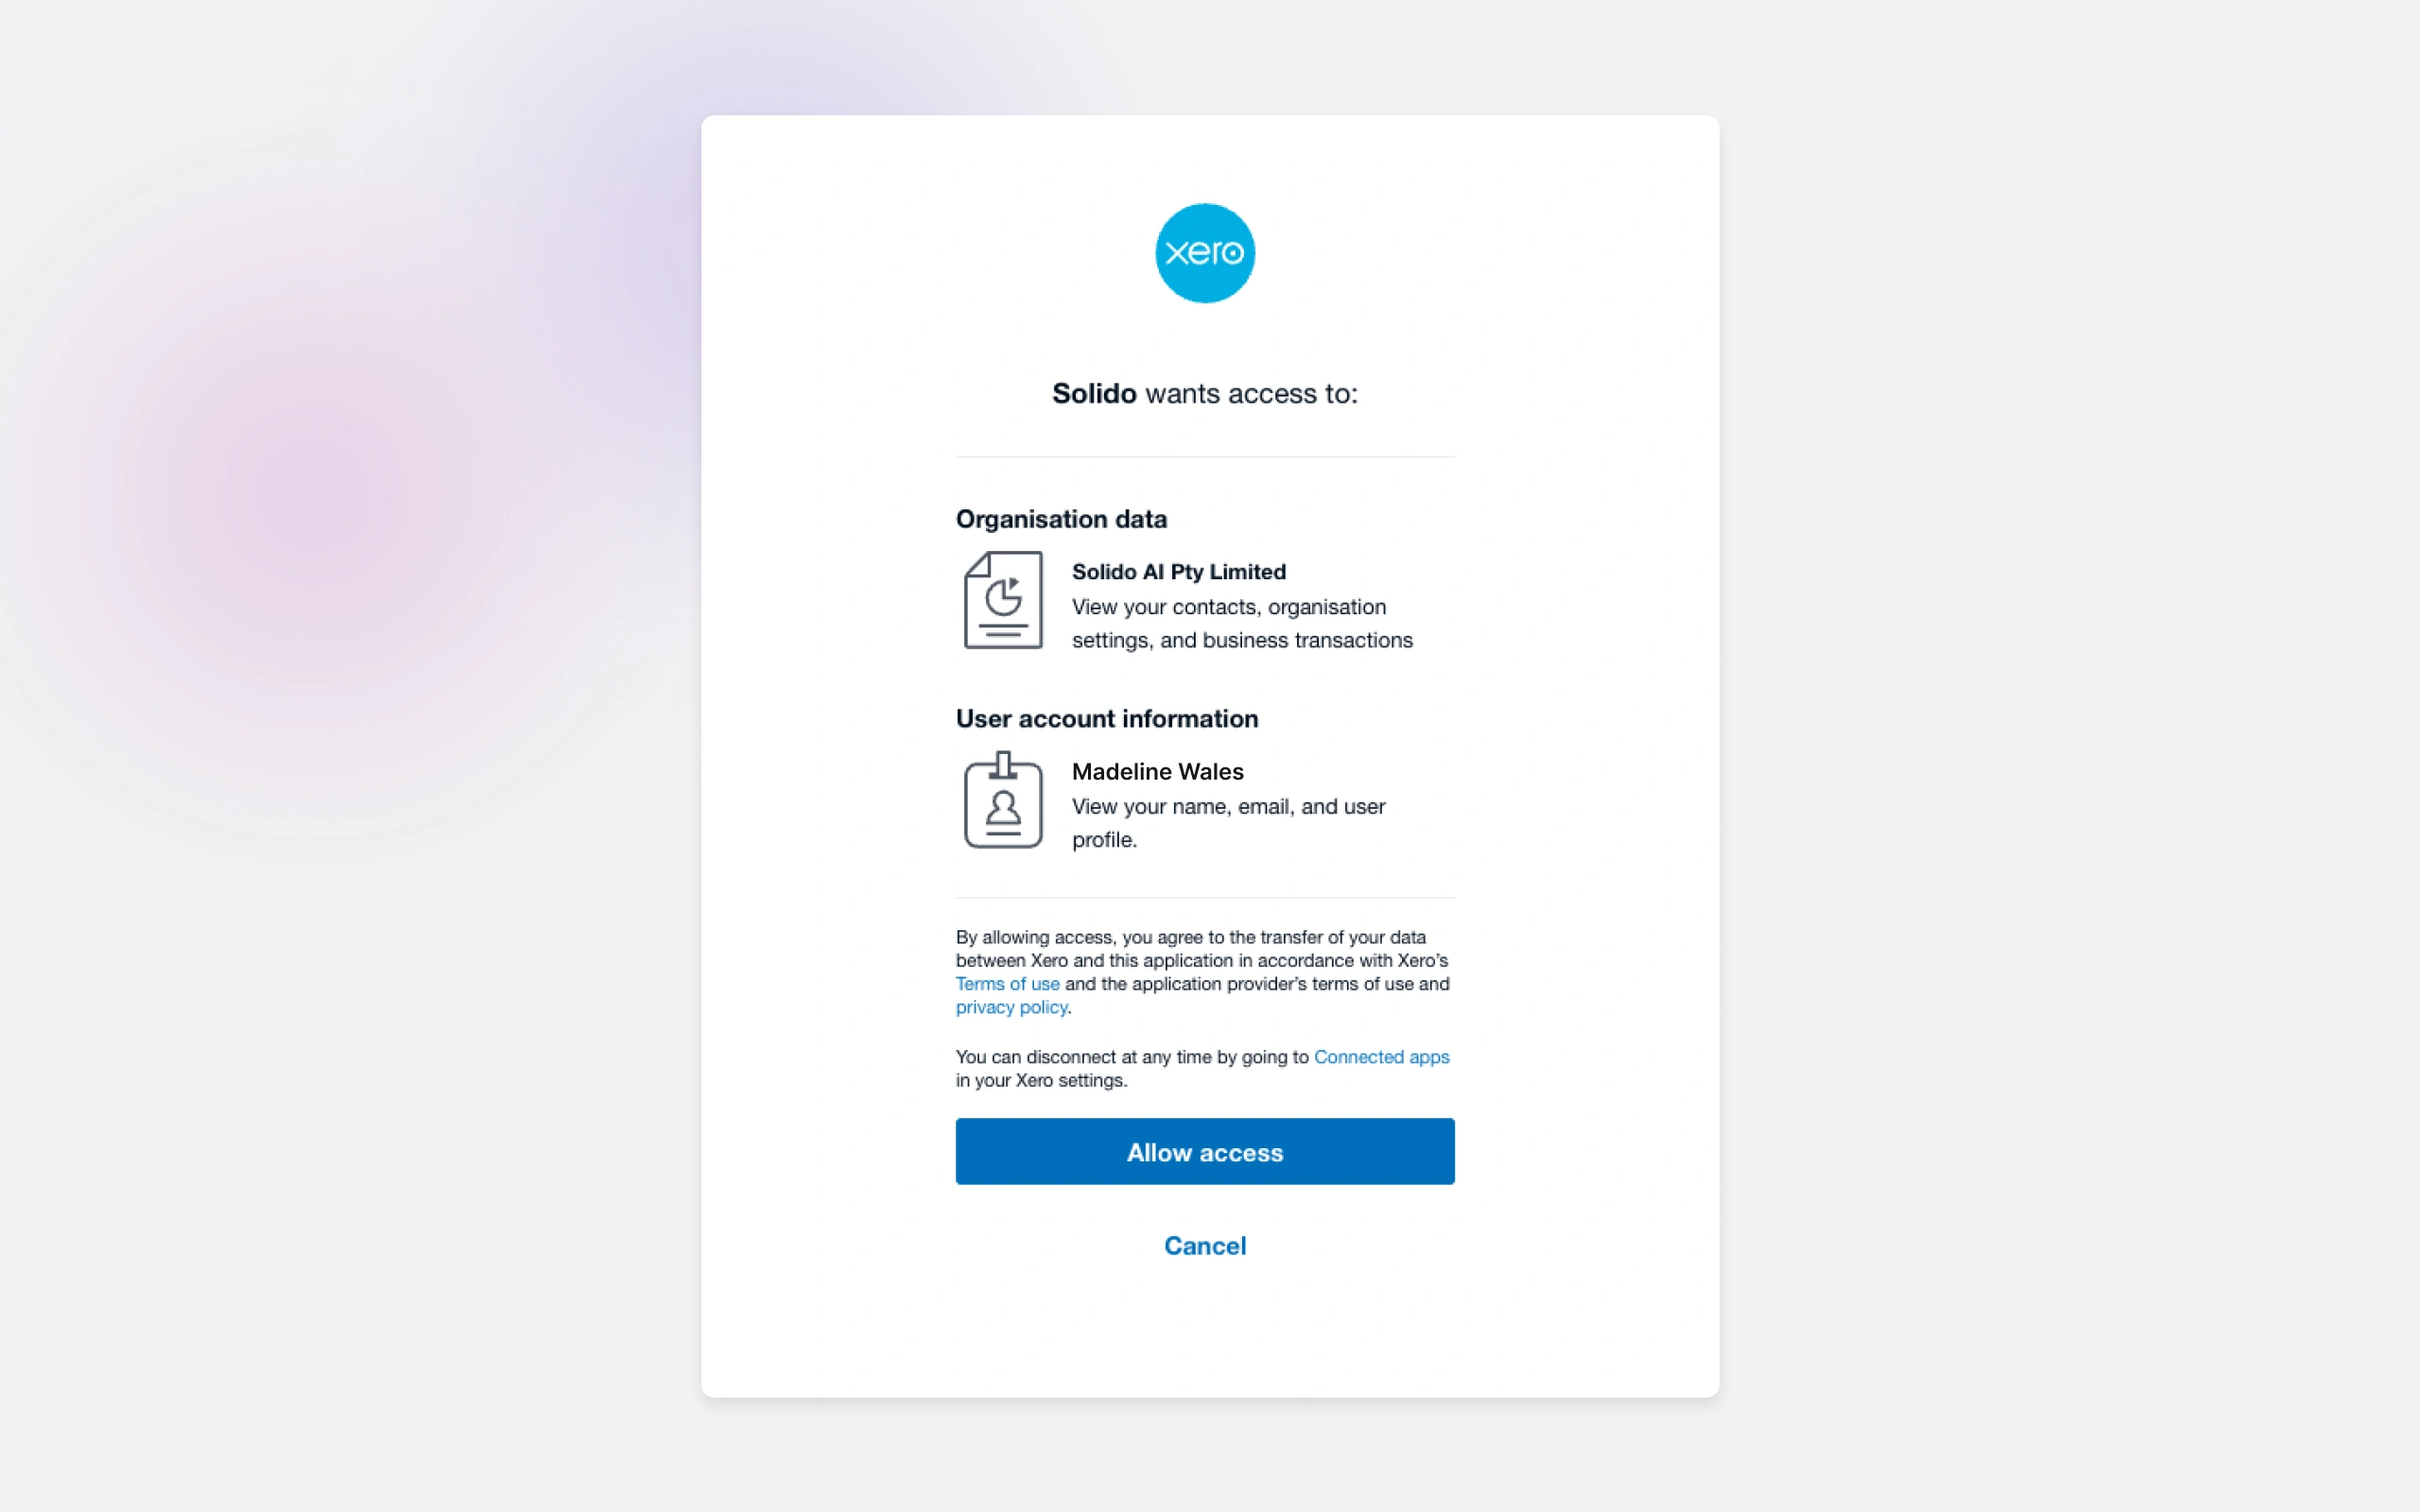
Step 2: Connect Your Xero Account
Link your Xero organisation to sync invoices and contacts.
- Click Connect Xero
- Sign in to Xero (if not already signed in)
- Select the organisation you want to connect
- Click Allow Access
Your invoices and contacts will begin syncing automatically, including historical data.
Step 3: Connect Your Email Account
Connect the email account Solido will use to send reminders.
- Click Connect Email
- Choose Microsoft 365 or Google Workspace
- Sign in and grant permission
Reminders will be sent from this address, and clients can reply directly to you.
You can add additional email senders later in Settings → Email Senders. This is useful if you want different reminders to come from different people (e.g. early reminders from accounts@, escalated reminders from a manager's address).
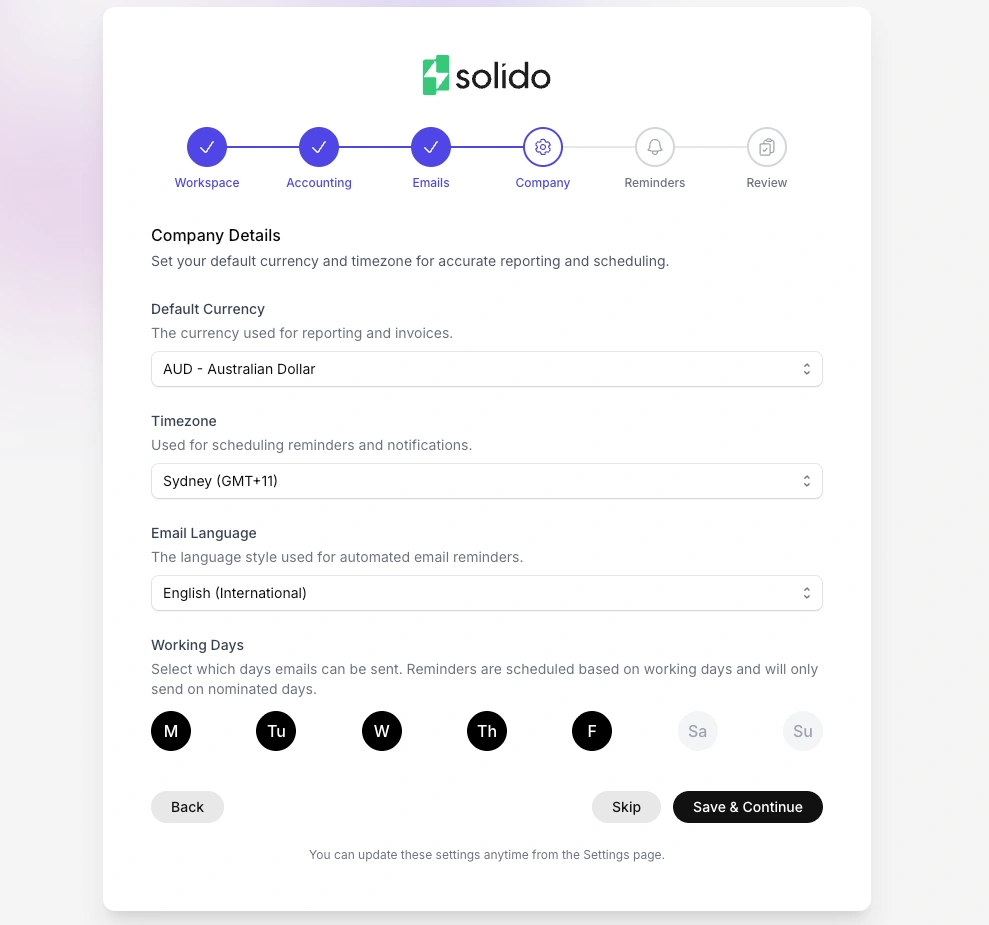
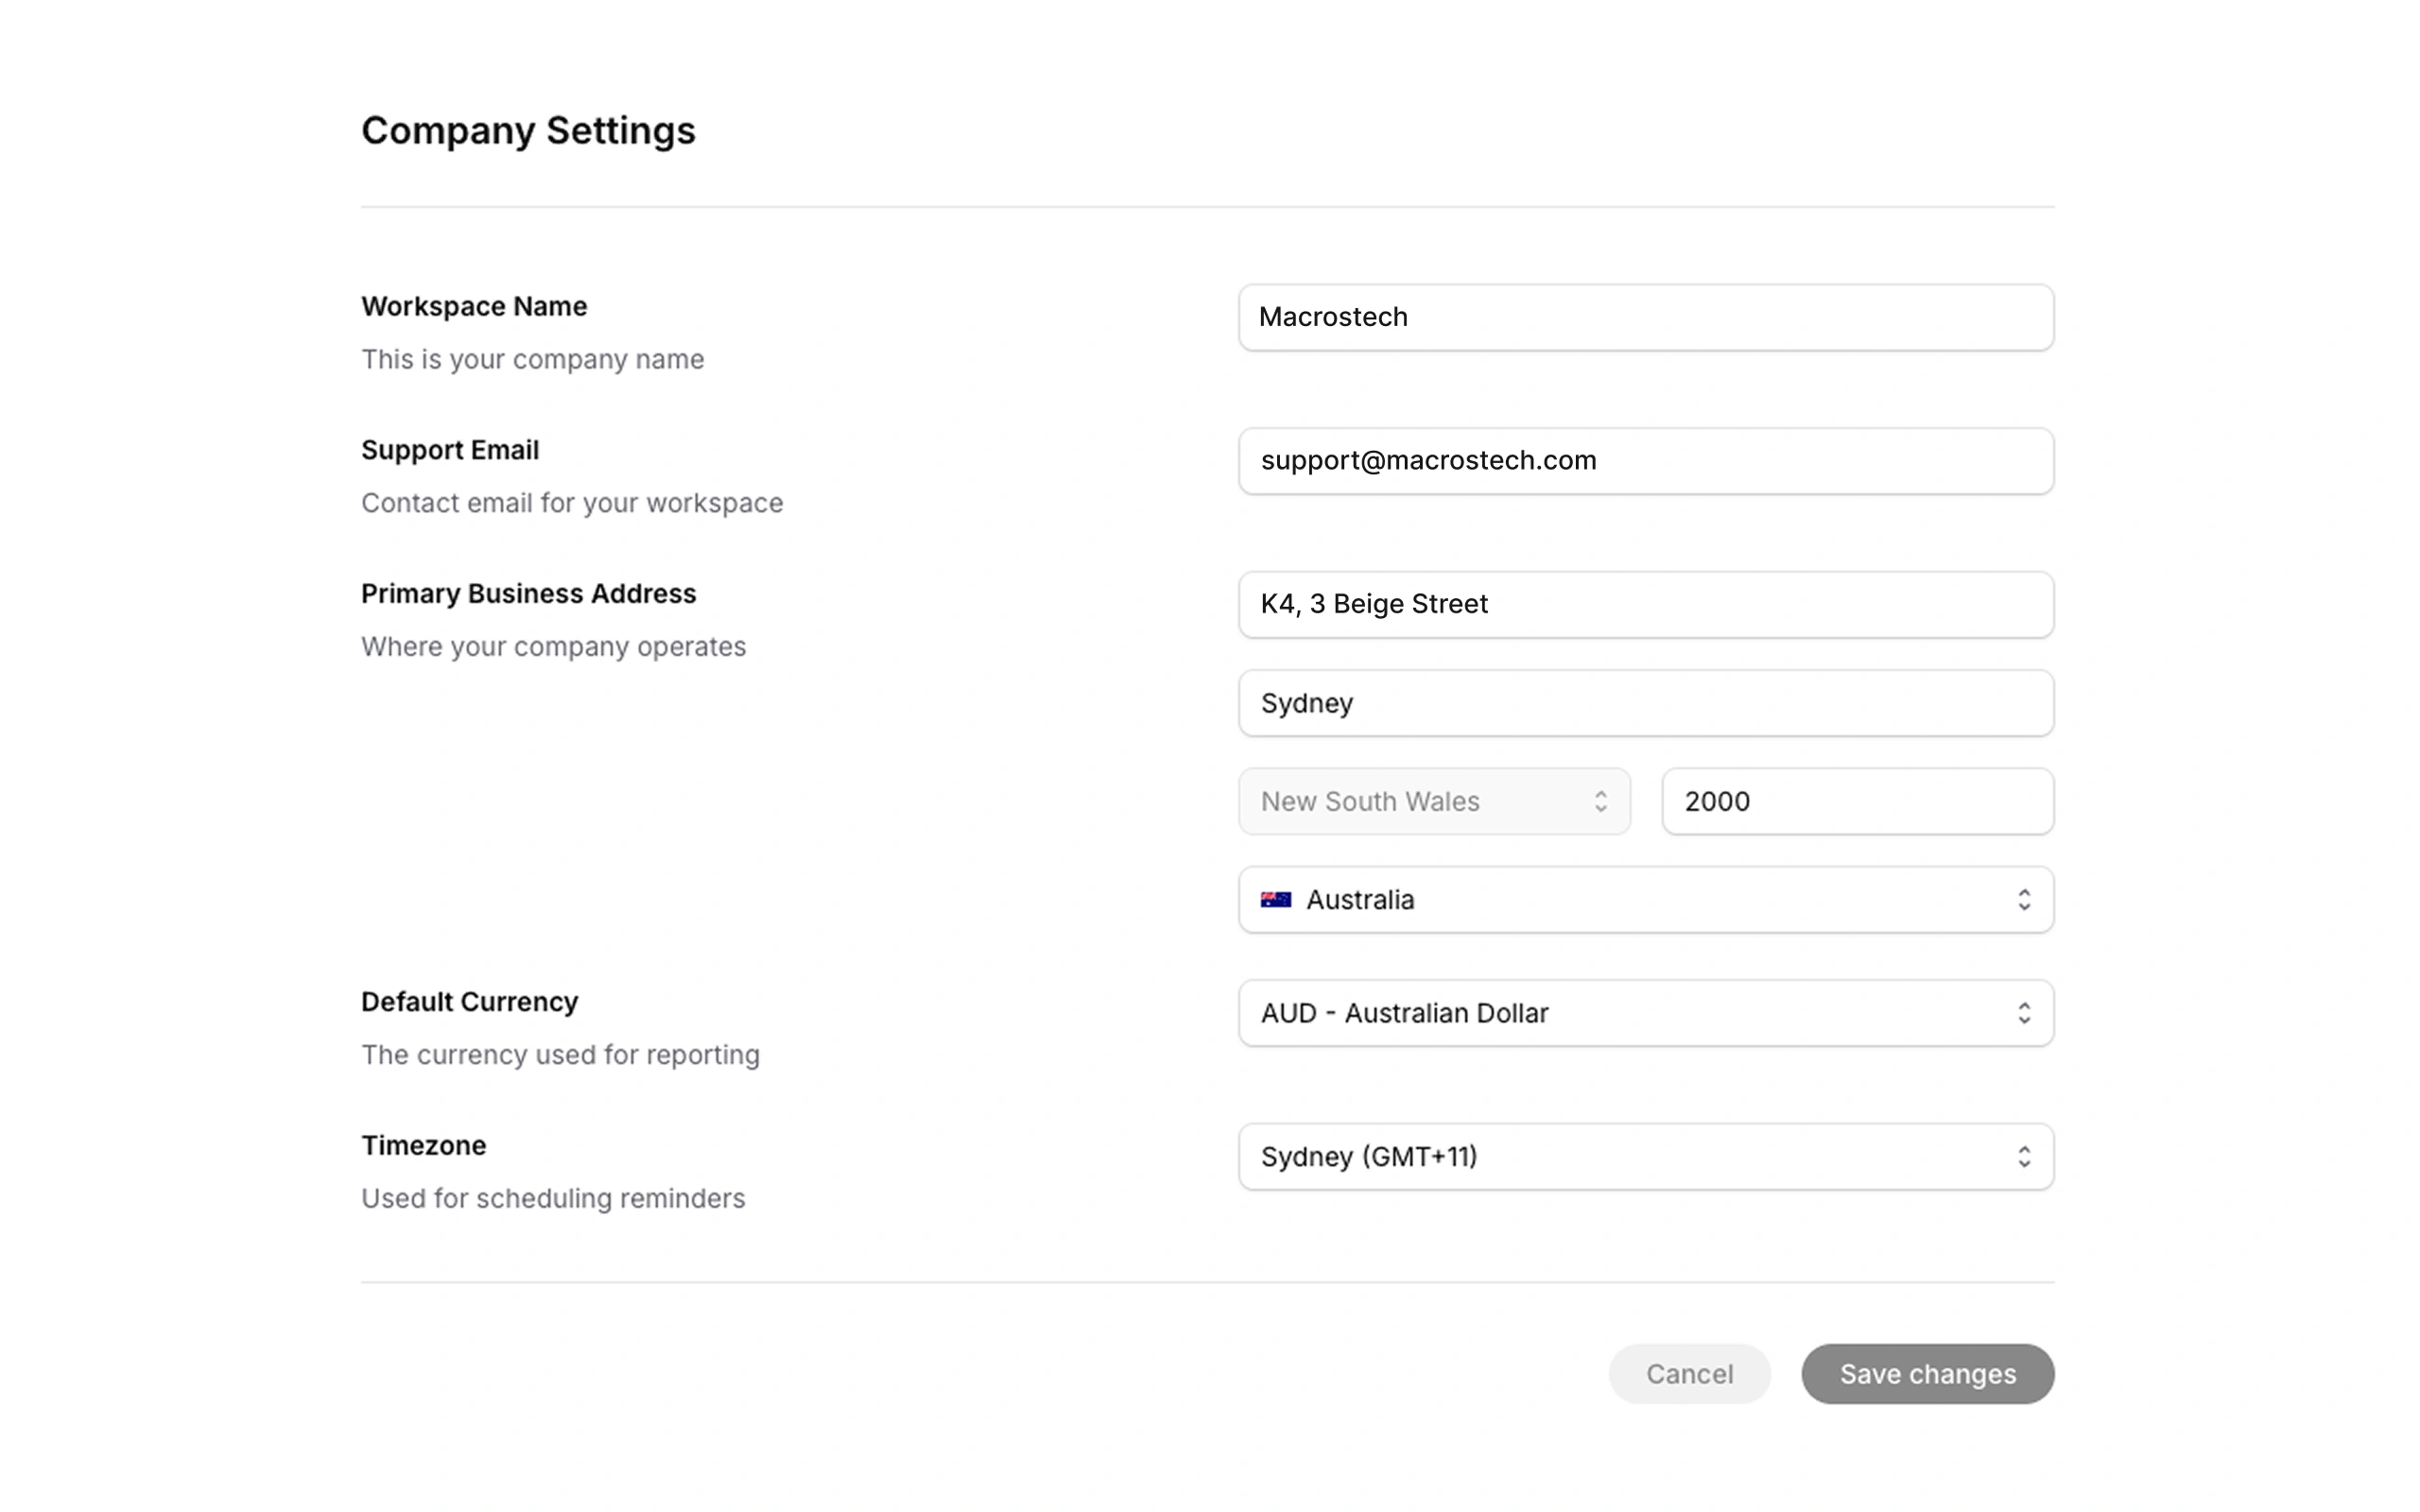
Step 4: Company Settings
Configure your workspace defaults:
- Default currency: Your primary currency for dashboard totals and reporting
- Timezone: Used for scheduling emails (e.g. "9:00 AM" means 9:00 AM in the selected timezone)
- Email language: The language Solido uses when generating reminder emails
- Working days: Which days of the week emails can be sent (e.g. Monday to Friday)
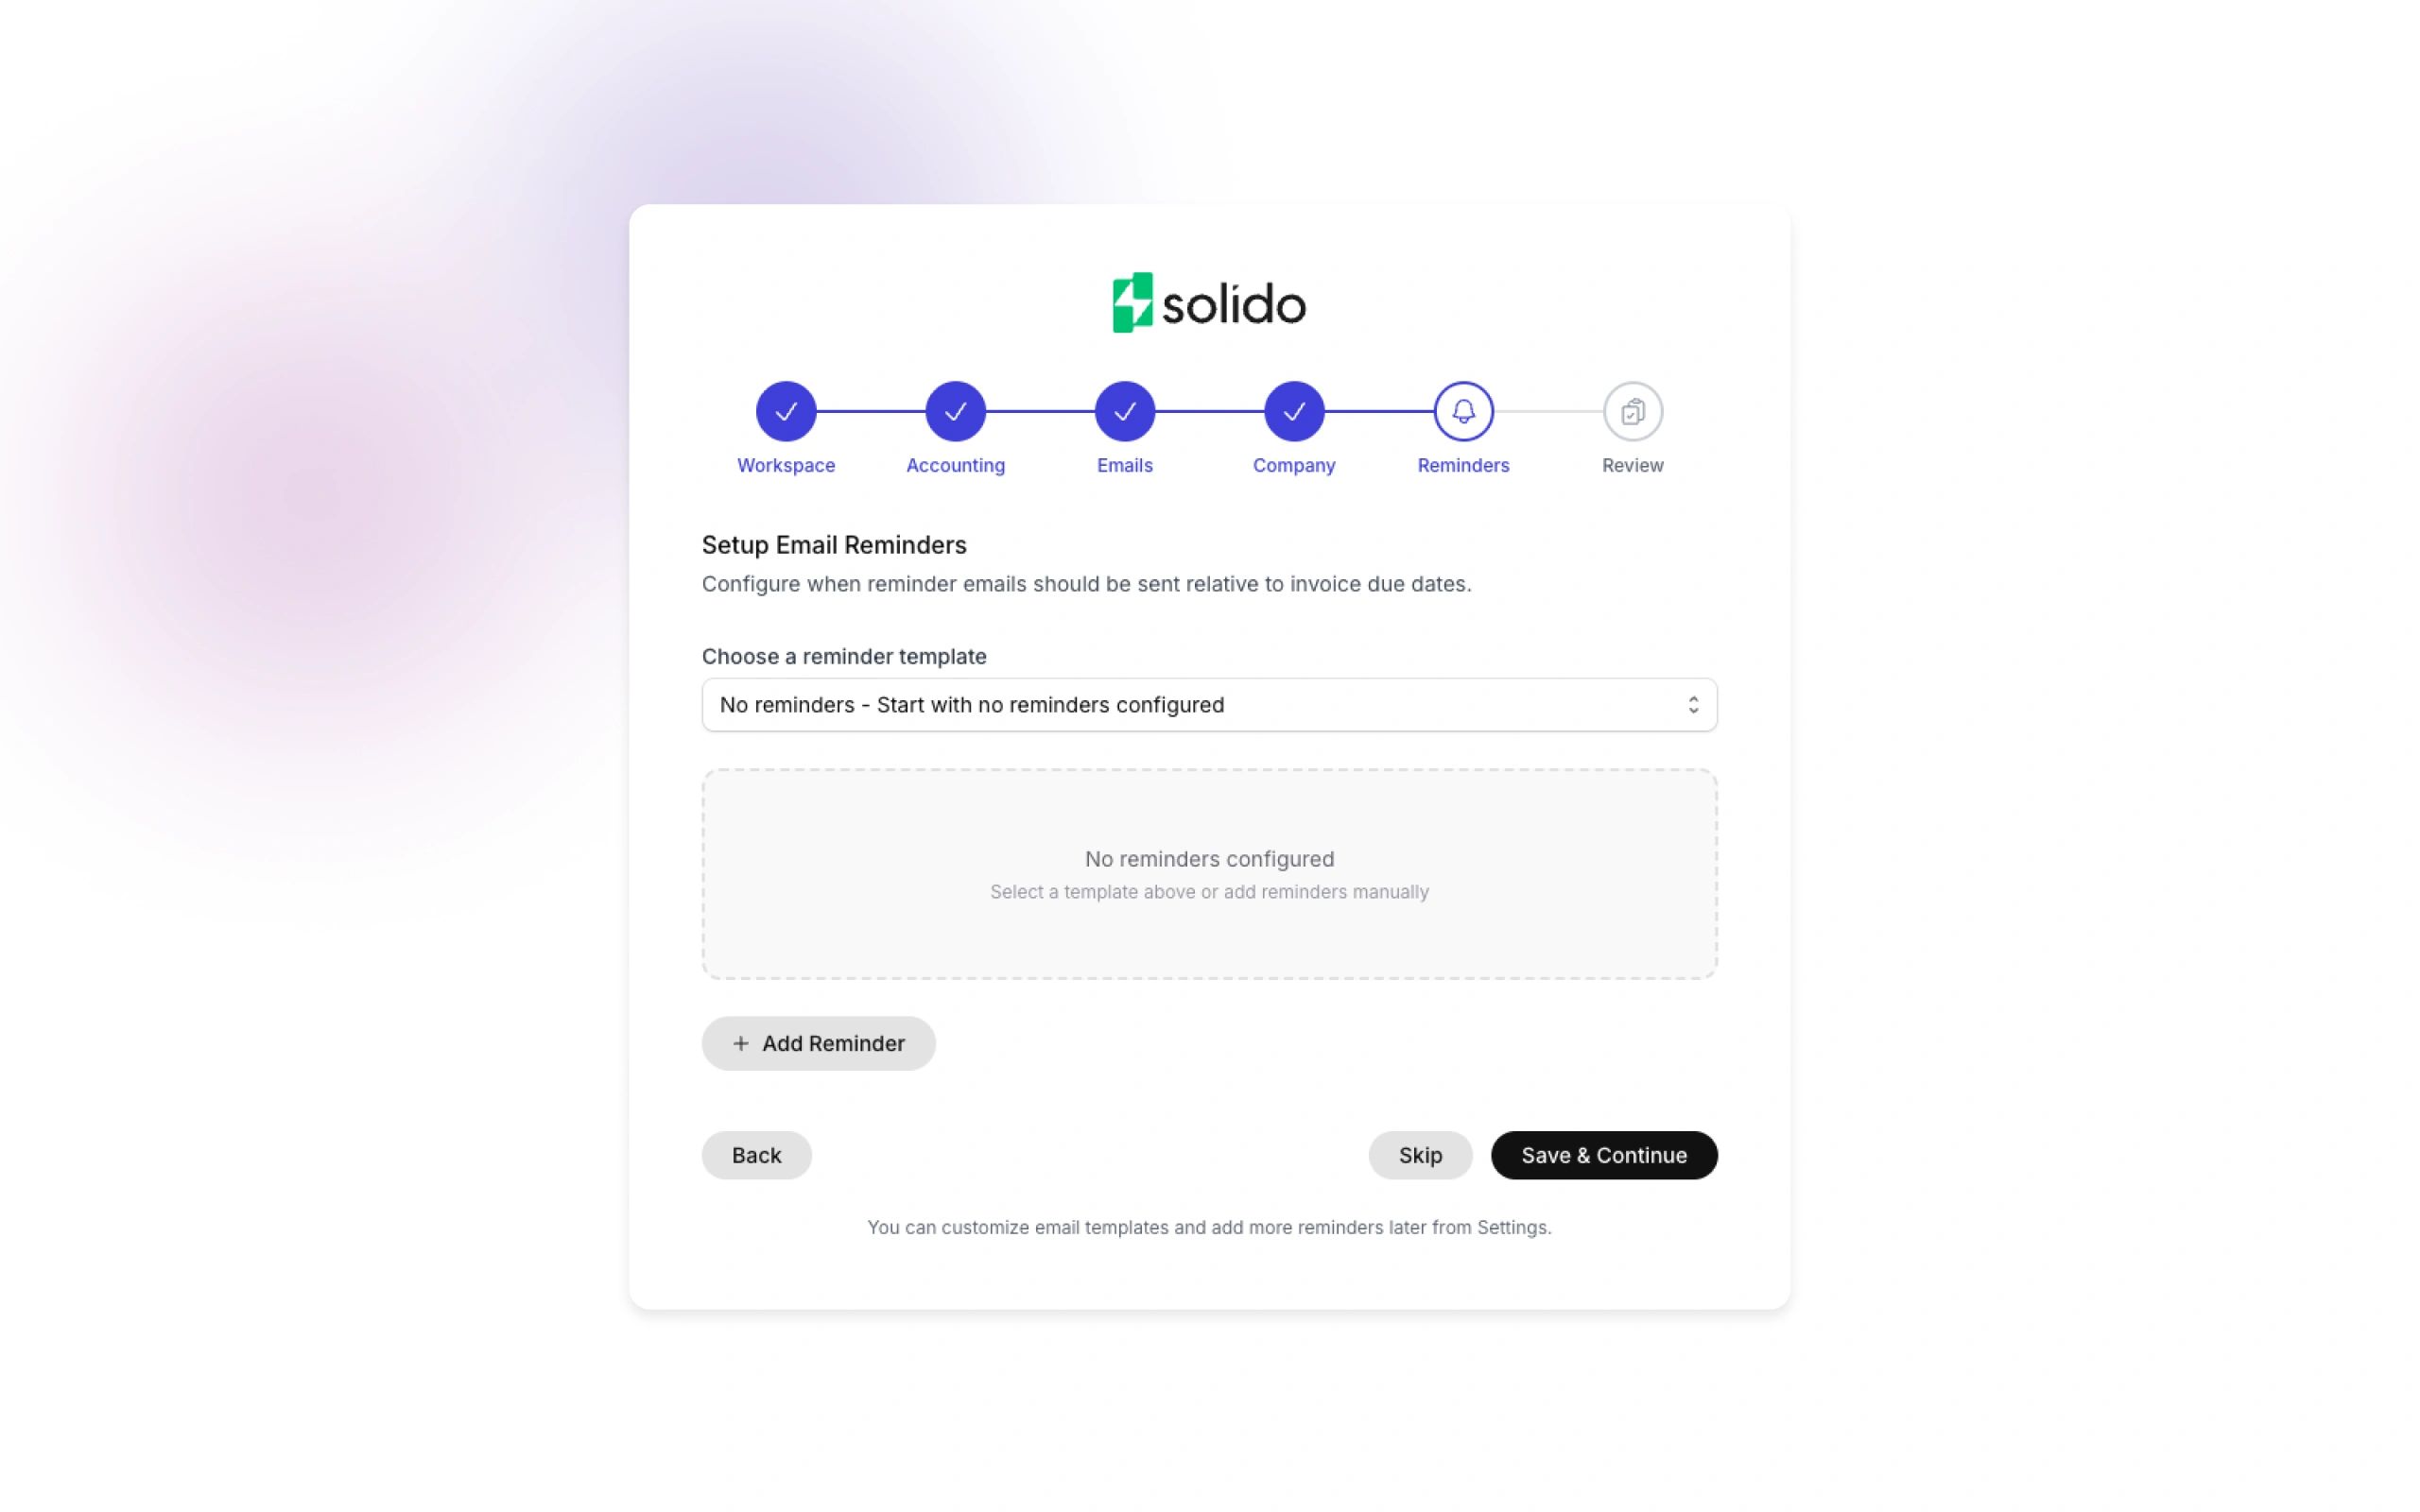
Step 5: Set Up Email Reminders
Configure your automated reminder rules. For each reminder, you'll set:
- When to send: The number of days before or after the invoice due date that you would like a reminder to be sent
- Which account to send from: Select from which of your connected email accounts you would like the email to be sent from
- Rules for the AI: Instructions that control how the email is written, including tone, style, structure, and what to emphasise
You can create multiple reminders to build a sequence. For example, you can have a reminders send 2 days before an invoice is due, 1 day after the invoice is due, 7 days after it is due, and 14 days after it is due.
Solido provides sensible default reminder schedules you can use, or you can customise the reminder frequency to suit your business.
Step 6: Select Your Plan
Choose your subscription plan:
- Basic: For solo operators and small teams
- Standard: For growing businesses needing more flexibility
- Pro: For larger teams or teams managing multiple entities
All plans include a 14-day free trial. You can change plans at any time.
After Onboarding
Once you've completed the onboarding flow:
- Your invoices and contacts will be syncing from Xero
- Your first reminders will be scheduled based on your rules
- You can access the dashboard to see your receivables overview
Optional next steps:
- Review your contacts and set any to inactive if needed
- Invite team members to collaborate
- Fine-tune your reminder rules based on your process
How the Integration Works
This section explains how Solido connects to Xero and your email provider, and how data flows between systems.
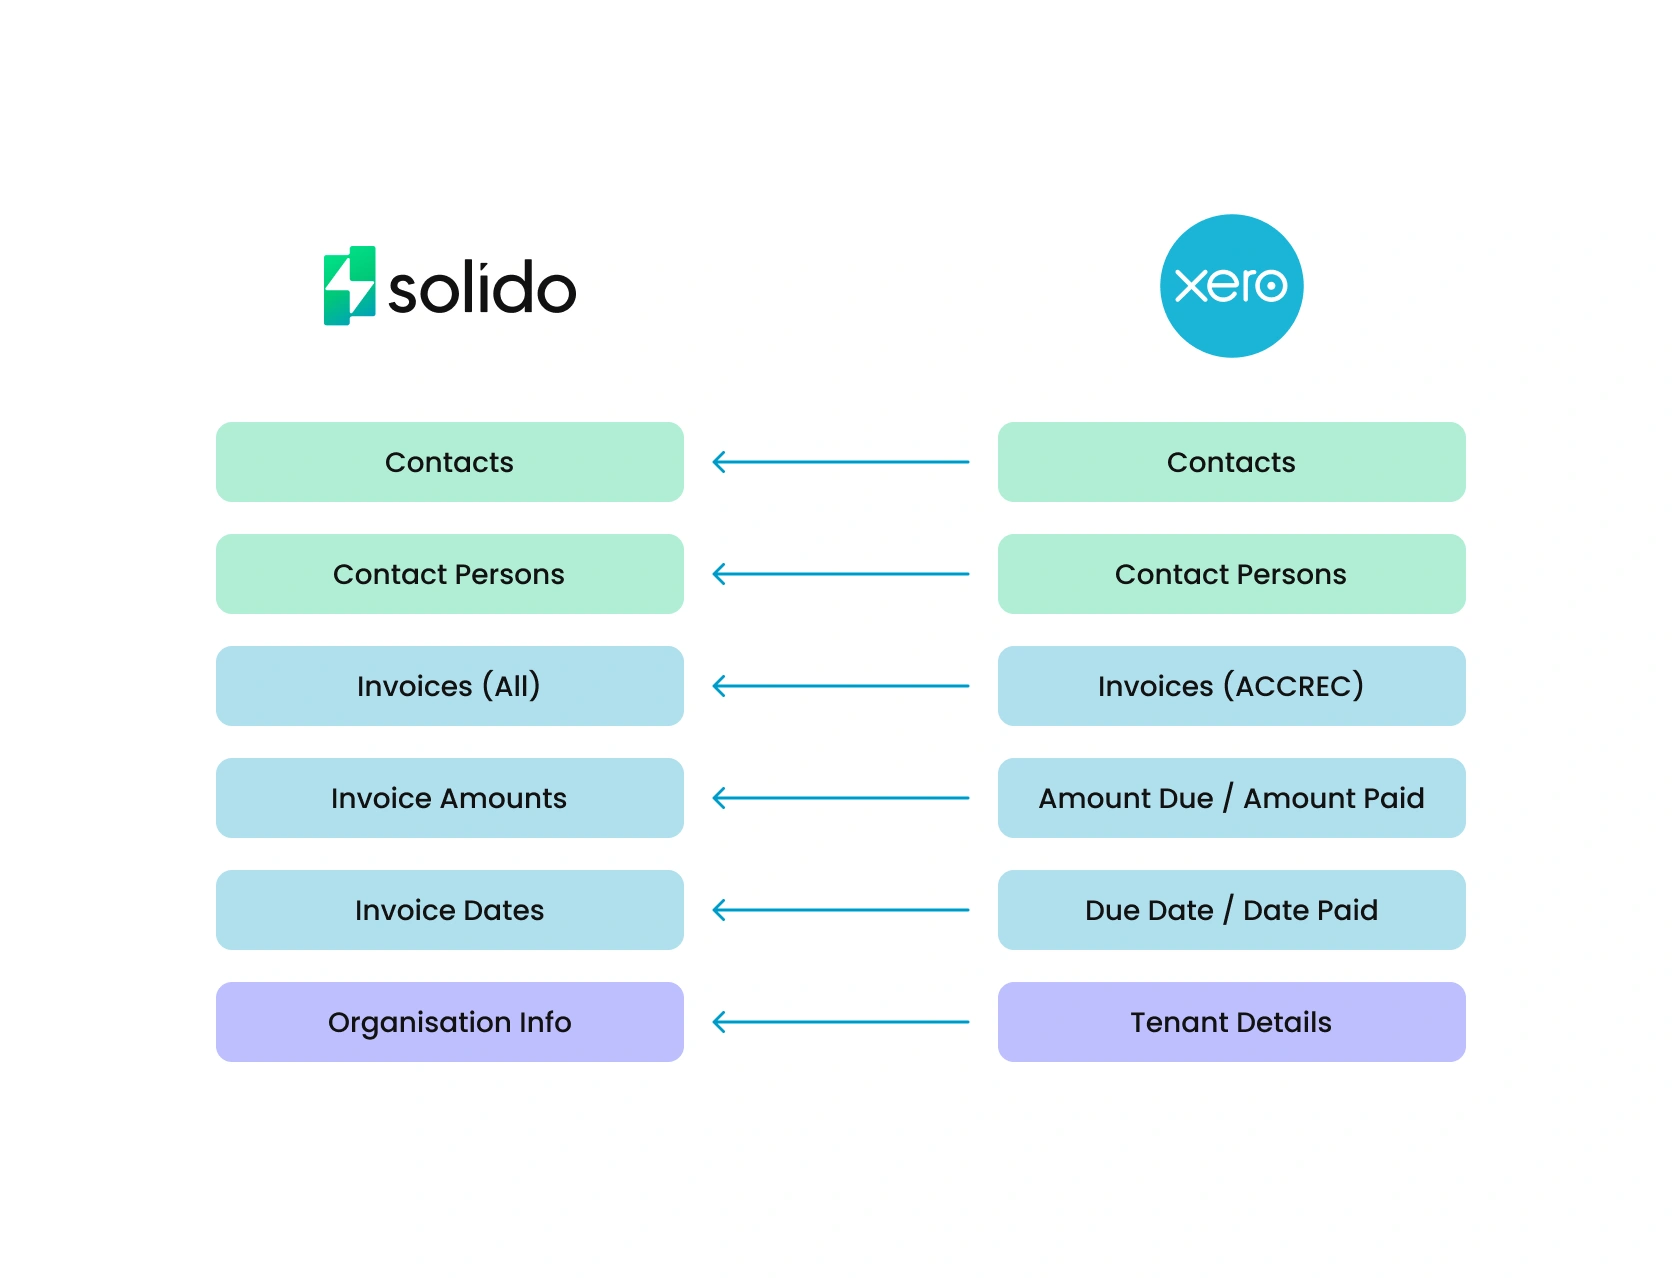
Data Sync
| Data | Direction | Frequency |
|---|---|---|
| Invoices | Xero → Solido | Automatic, includes historical invoices |
| Contacts | Xero → Solido | Automatic, includes email addresses |
| Payment status | Xero → Solido | Real-time updates |
| Invoice amounts & due dates | Xero → Solido | Automatic |
What Solido Does Not Do
Solido does not:
- write data back to Xero
- create, edit, or delete invoices in Xero
- modify contacts in Xero
- Solido does not record payments in Xero
Solido is a read-only integration with Xero. All invoice and payment management continues in Xero as normal.
How Emails are Sent
Solido generates reminder emails based on your configured rules. Emails are sent through your connected Microsoft 365 or Google Workspace account and will appear in your “Sent” folder once sent.
Clients can reply directly to you and you will be able to access and respond to these emails as you normally would.
When an invoice is marked as paid in Xero, Solido automatically stops sending reminders for that invoice.
Subscriptions & Billing
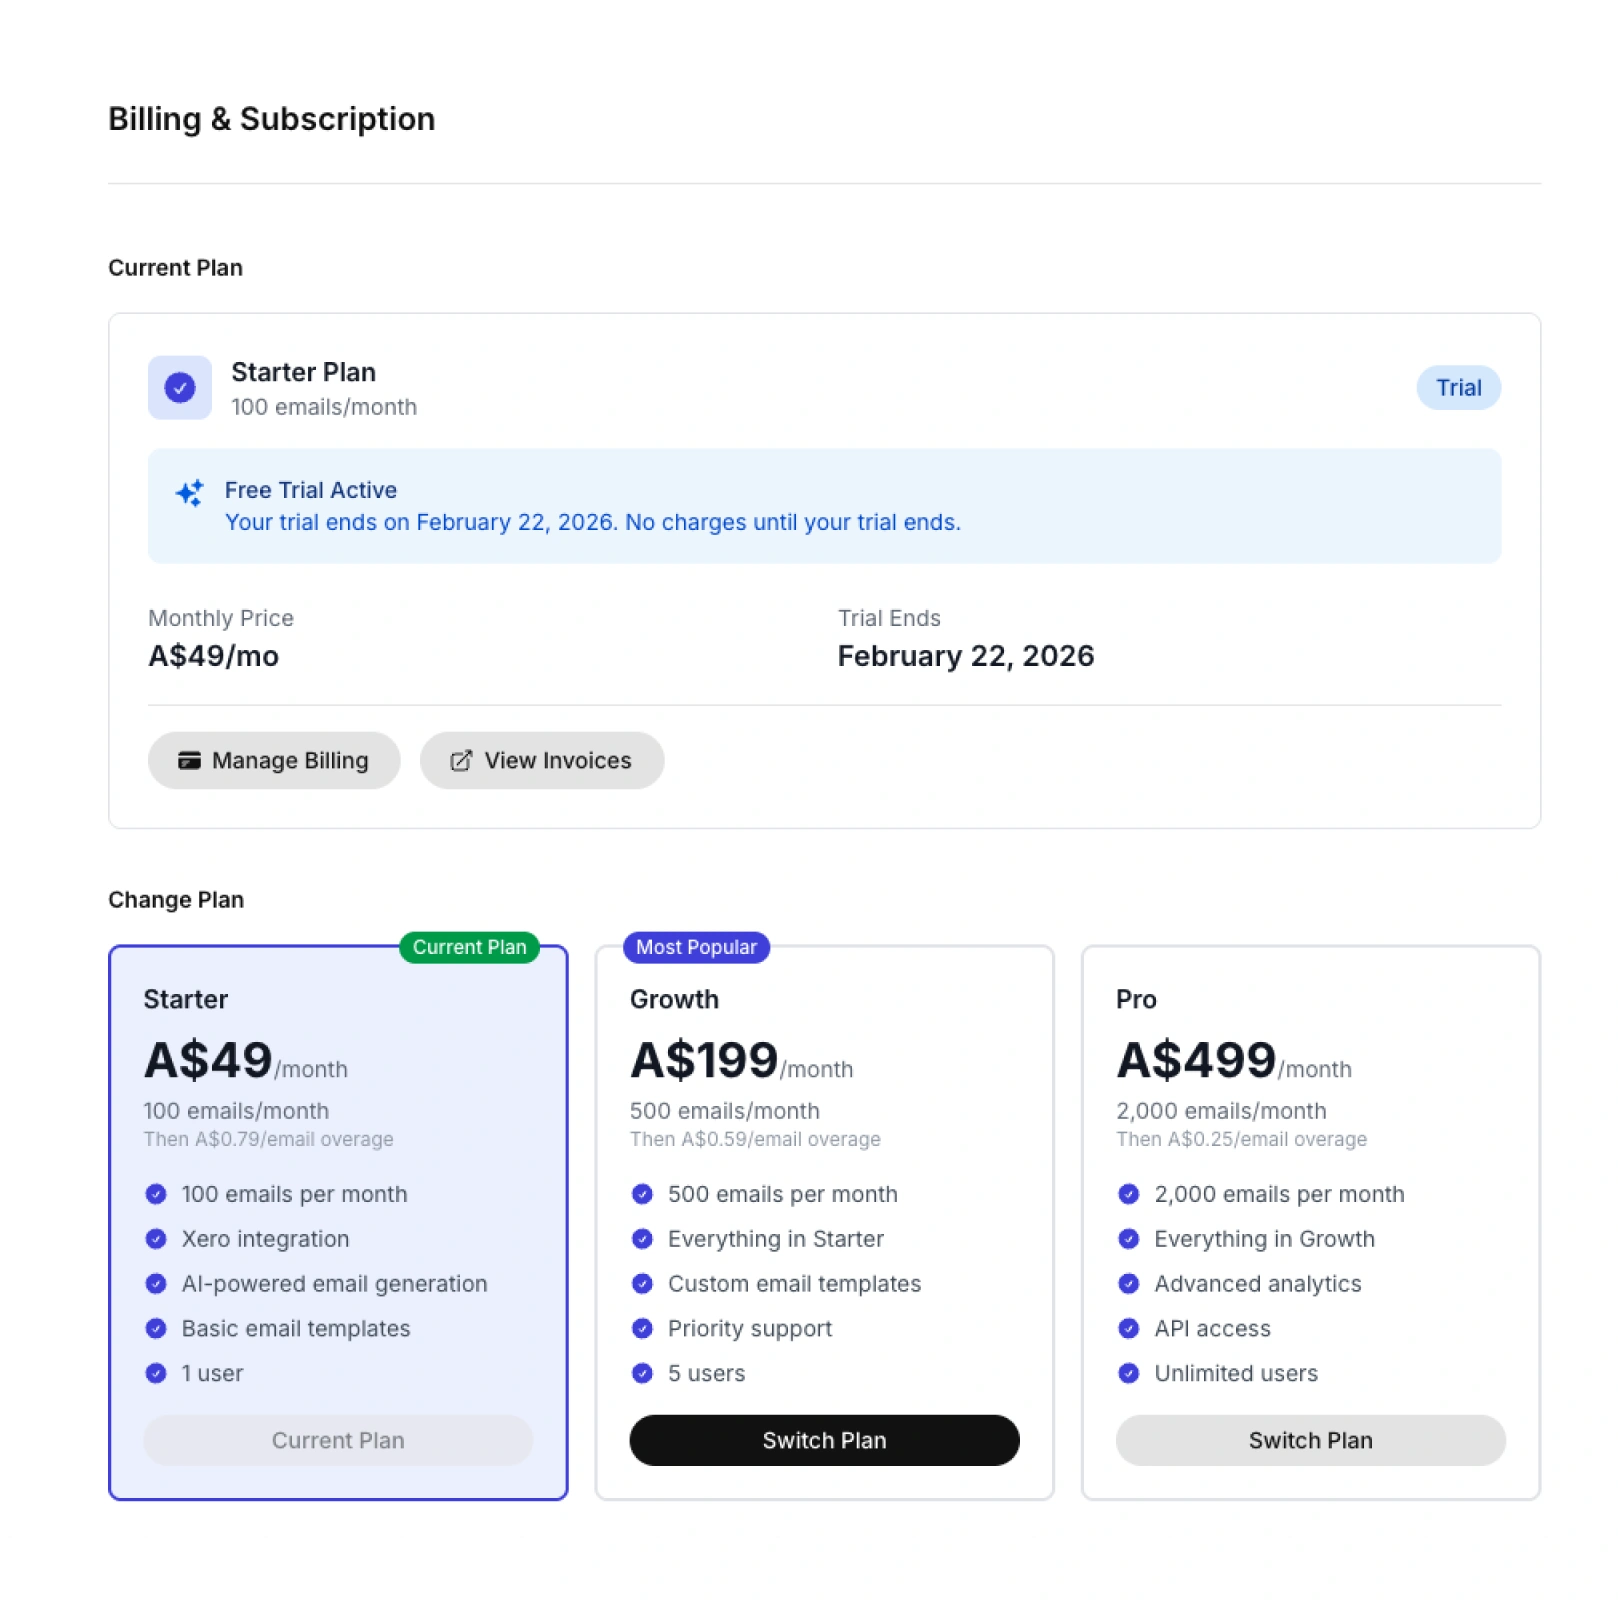
Plans Overview
You can select your plan during the onboarding flow, or can do this by selecting Billing from the Settings menu.
| Feature | Starter ($49/mo) | Growth ($199/mo) | Pro ($499/mo) |
|---|---|---|---|
| Emails per month | 100 | 500 | 2,000 |
| Overage rate | $0.79/email | $0.59/email | $0.25/email |
| Users | 1 | 5 | Unlimited |
| Xero integration | ✓ | ✓ | ✓ |
| AI-powered email generation | ✓ | ✓ | ✓ |
| Email templates | Basic | Custom | Custom |
| Basic analytics | ✓ | ✓ | ✓ |
| Advanced analytics | — | — | ✓ |
| API access | — | — | ✓ |
| Email support | ✓ | ✓ | ✓ |
| Priority email support | — | ✓ | ✓ |
| Phone support | — | — | ✓ |
Free Trial
Your 30-day free trial begins when you complete the onboarding. You will be required to provide payment details as part of the onboarding, but you will not be charged until the end of the trial period.
During the trial period, you will have full access to all features of your selected plan.
At the end of your 30-day trial, you'll be automatically charged for your first billing period.
How Billing Works
Solido bills monthly in advance:
- Your first charge occurs when your 30-day free trial ends
- Each month, you're charged at the start of the billing period for that month
- If you cancel, you retain access until the end of your current paid period
Changing Your Plan
You can change your plan at any time.
- Go to Settings → Billing
- Select your new plan
- select Switch Plans
When changes take effect:
- Upgrades take effect immediately. You'll be charged a pro-rated amount for the remainder of your current billing period.
- Downgrades take effect at the start of your next billing period. You'll retain access to your current plan's features until then.
Only the Account Owner is authorised to change the plan.
Viewing Billing History
You can access past invoices
- Go to Settings → Billing
- Select View Invoices
You will then be able to view past invoices and download receipts as needed.
Updating Payment Details
To update payment details:
- Go to Settings → Subscription
- Scroll down to Payment Method
- Click Update Payment
Cancelling Your Subscription
To cancel your subscription:
- Go to Settings → Subscription
- Click Cancel Subscription
- Confirm your cancellation
After cancelling:
- You'll retain access until the end of your current billing period
- Your data will be preserved (your account is paused, not deleted)
- You can resubscribe at any time to regain access
Workspace Settings
A workspace in Solido represents one business entity. Each workspace has its own Xero connection, contacts, invoices, and settings.
Accessing Workspace Settings
From Settings, select Workspaces and click Switch to this workspace to choose which Workspace you would like to manage.
Then, select General Settings from Settings. From there, you can change the following settings:
- Workspace name: this is the display name for this workspace. It is useful for identifying workspaces if you manage multiple businesses
- Default currency: This is the primary currency you use for transacting and reporting for dashboard totals and reporting. Individual invoices still display in their original currency.
- Timezone: Sets the timezone for scheduled email delivery. The times email reminders are set to send are based on this timezone (for example "9:00 AM" means 9:00 AM in your set timezone).
- Email language: This is the language Solido will use when generating reminder email reminders.
- Working days: These are the days of the week that emails can be sent on. This is also used for calculating how many days before or after an invoice is due a reminder is sent. Typically, users set Working Days as Monday to Friday, but you can customise this based on your preferences. Emails scheduled for non-working days will be held until the next working day.
Managing Multiple Workspaces
If you manage multiple businesses or entities, you can create separate workspaces for each.
To create a new workspace:
- Go to Settings → Workspaces
- Click Create Workspace
- Enter the workspace name
- Click Create
You'll need to connect Xero and email accounts separately for each workspace, and set your workspace settings.
To switch between workspaces:
- Go to Settings → Workspaces
- Select the Workspace you would like to use and click Switch to this workspace
Each workspace is completely separate - data, settings, and team members don't overlap.
Connecting Your Accounts
Connecting Xero
Solido syncs your invoices and contacts from Xero automatically. To connect:
- Go to Settings → Integrations
- Click Connect Xero
- You'll be redirected to Xero to log in
- Select the organisation you want to connect
- Click Allow Access
- You'll be returned to Solido
What syncs:
- All invoices (including historical)
- Contact details and email addresses
- Payment status of invoices
Each workspace connects to one Xero organisation. You can connect multiple Xero organisations by setting up multiple workspaces.
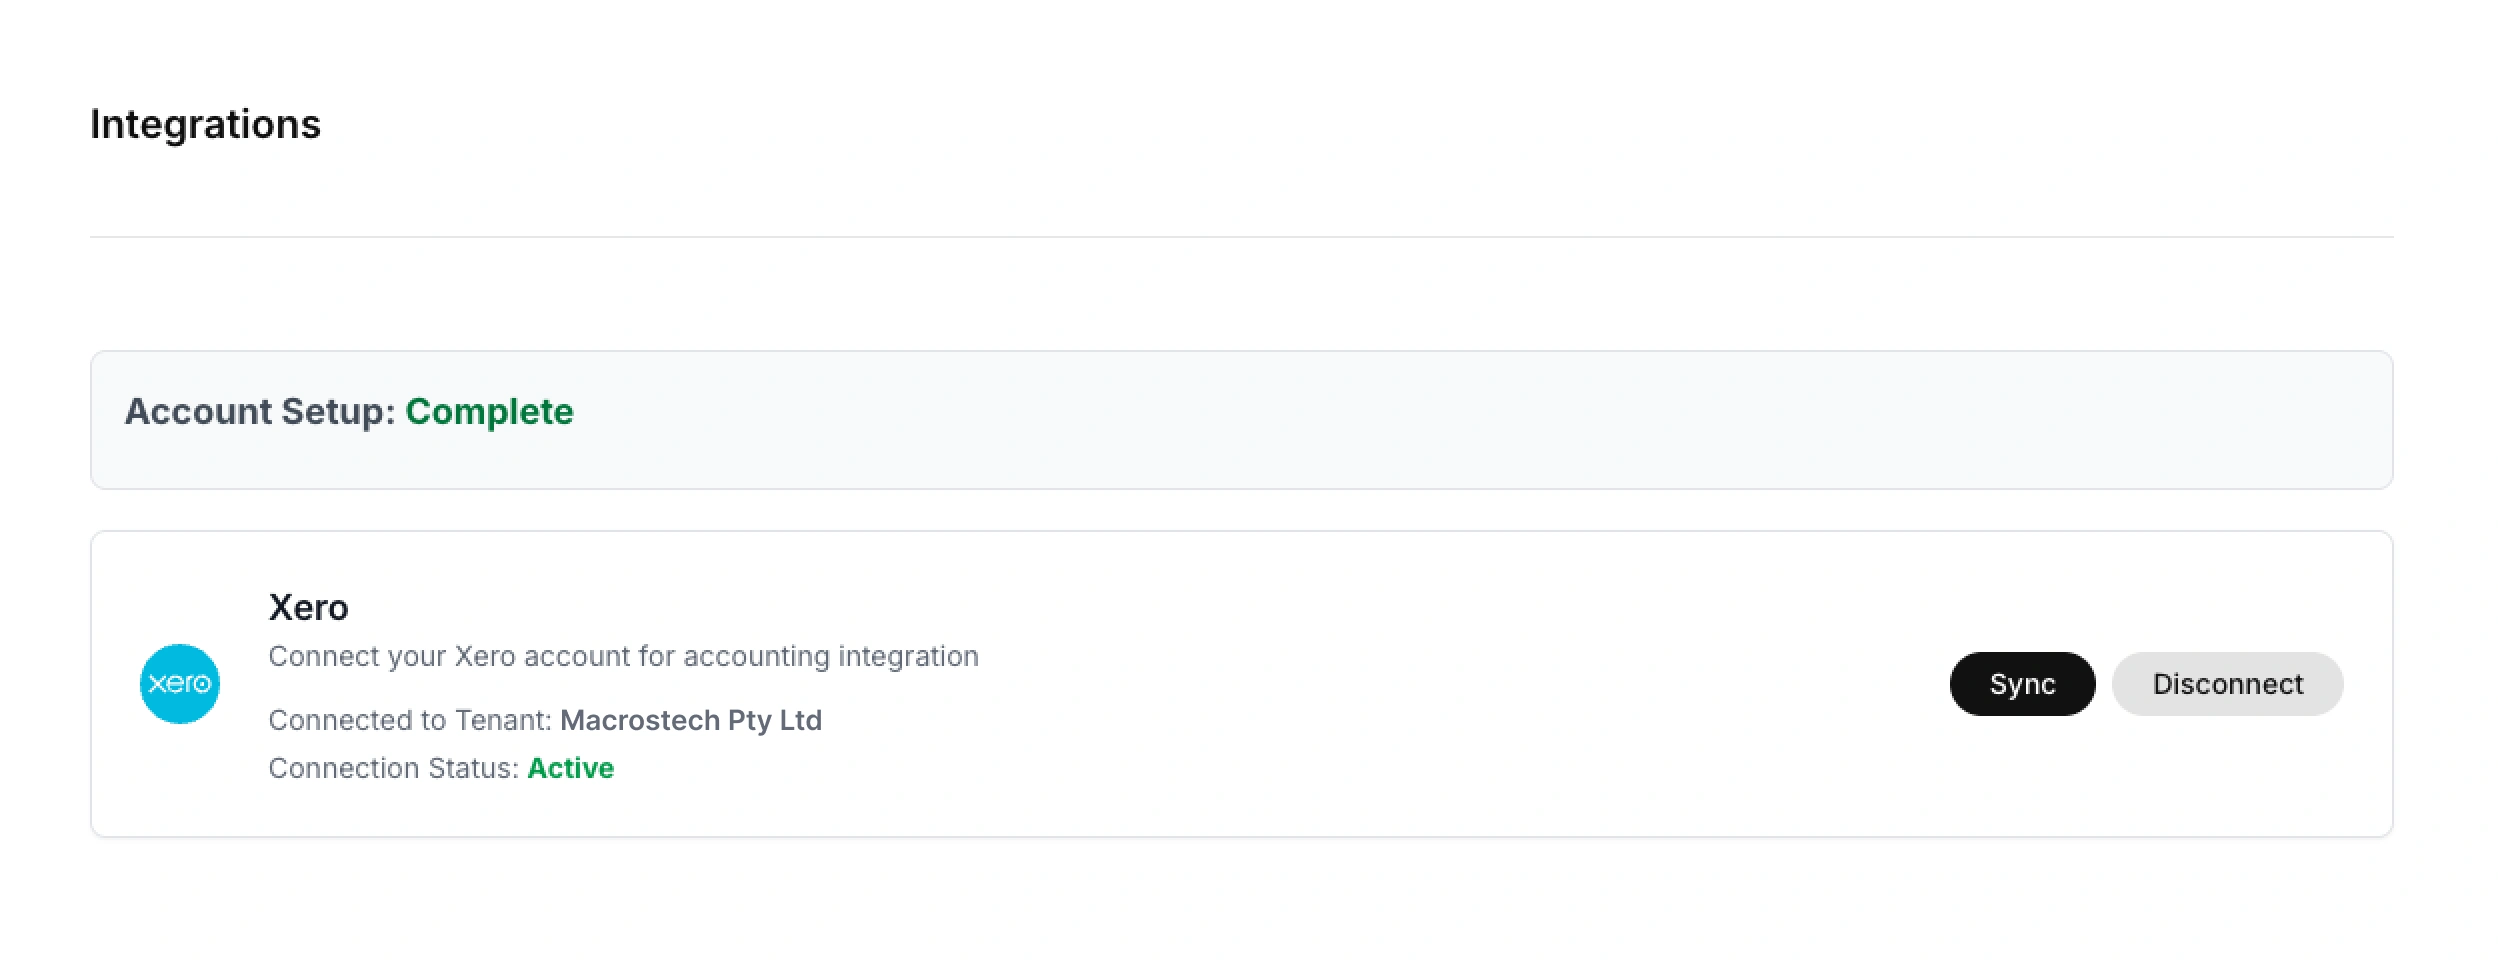
Monitoring Sync Status
To view the sync status, go to Settings → Sync Status. From there, you will be able to see:
- Total number of syncs processed
- The success rate of previous syncs
- The status of each previous sync
- The type of sync (invoice or contact)
- The date and time of each previous sync
If Sync Fails
- Check the error message displayed
- Click Retry Sync to attempt again
- If problems persist, try disconnecting and reconnecting Xero
Disconnecting Xero
- Go to Settings → Integrations
- Click Disconnect next to Xero
- Confirm the disconnection
Disconnecting Xero will stop invoice and payment syncing. Existing data in Solido will be retained but won't update.
Email Configuration
Adding Email Senders (Mailboxes)
Solido sends reminder emails from your own email address, not from a generic system address.
For this to happen, you will need to connect at least one mailbox. Currently, Solido can connect with Microsoft 365 / Outlook and Google Workspace / Gmail.
To connect a mailbox:
- Go to Settings → Email Mailboxes
- Click Add Mailbox
- Enter the Email Address and Display Name of the mailbox you wish to add
- Click Send Invitation
The mailbox will then receive an invitation from Solido to connect to the Workspace and to authorise Solido to send emails on behalf on its behalf.
After connecting, you can add an e-mail signature for each mailbox, which will appear at the bottom of all emails sent from the mailbox.
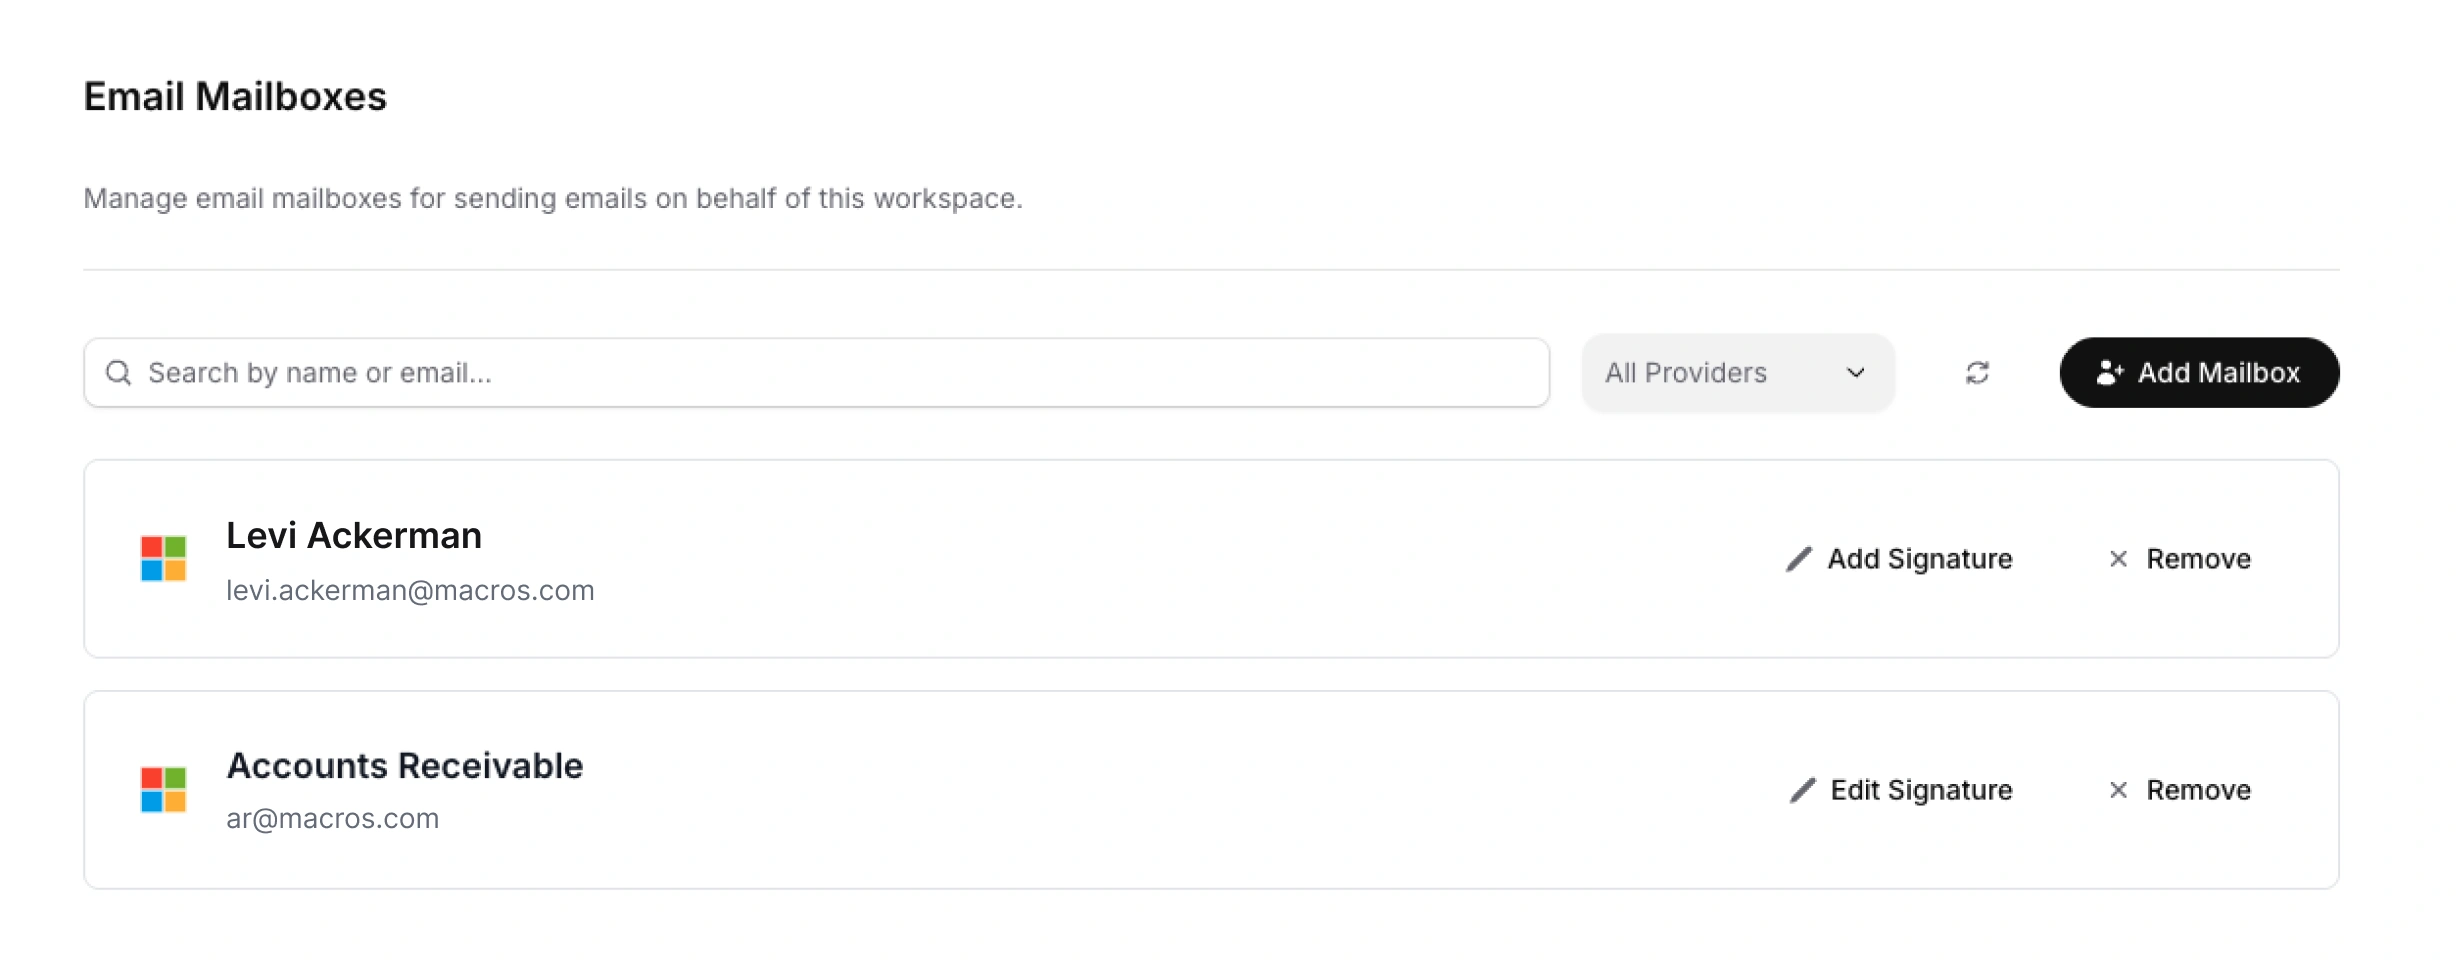
To remove a mailbox:
- Go to Settings → Email Mailboxes
- Click Remove next to the Mailbox you wish to remove
- Confirm the removal
If you remove a mailbox that's assigned to active reminder rules, those rules will be paused until you assign a different mailbox.
Email Reminders
Email Reminder settings define when Solido sends automated reminder emails and how each reminder is written. Each rule specifies:
- Timing: When to send relative to the invoice due date
- Schedule: What time and on which days
- Sender: Which mailbox sends the email
- Email Reminder Settings: Rules that control how the email is written
You can create multiple reminder rules to build a sequence. For example, you can have:
- Rule 1: 2 days before due date (friendly reminder of upcoming payment)
- Rule 2: 2 days after the due date (first overdue reminder)
- Rule 3: 7 days after due date (second overdue reminder)
- Rule 4: 14 days after due date (third overdue reminder)
- Rule 5: 30 days after due date (final reminder)
Creating Email Reminders
To create Email Reminders:
- Go to Settings → Reminder Rules
- Click Add Reminder
- Configure the rule settings (see below)
- Repeat steps 2 and 3 until the desired number of Email Reminders have been created.
- Click Save
Rule Settings
| Settings | Description |
|---|---|
| Reminder Number | The number of the reminder in the sequence |
| Working Days | Specify the number of Working Days before or after the due date of the invoice that the email reminder should be sent |
| Before/After Due | Nominate whether the email reminder should send before or after the due date |
| Send Time | Specify the time of day that email reminders are sent (in your workspace timezone) |
| Send From | Choose which connected email account the email reminder will send from |
| Customise | Set rules that control the tone and content of the email reminder (detailed below) |
Configuring Email Settings for Each Email Reminder
Each email reminder in the reminder sequence has its own settings that control how Solido generates the email. Rather than use a template, you provide Solido with rules and instructions, and Solido composes an appropriate email based on them.
Email reminders will always be composed in a professional tone, and invoice details (such as amount, due date, and invoice number) are included automatically. Solido will also automatically attach a copy of the invoice to the email when it sends.
To configure the rules for a particular Email Reminder:
- Go to Settings → Email Reminders
- Click Customise on the rule you want to configure
- Set the number of Working Days before or after the due date of the invoice that the email reminder will send
- Select whether you would like the Email Reminder will send before or after the invoice due date
- Specify the time of day that the reminder will send
- Choose which connected email account the email reminder will send from
- Enter your email rules
- Once you have entered your email rules, click Generate to see an example of the email reminders that will be sent based on the rules you set
- Click Save
You can edit your Reminder Rules at any time by going to Settings → Reminder Rules.
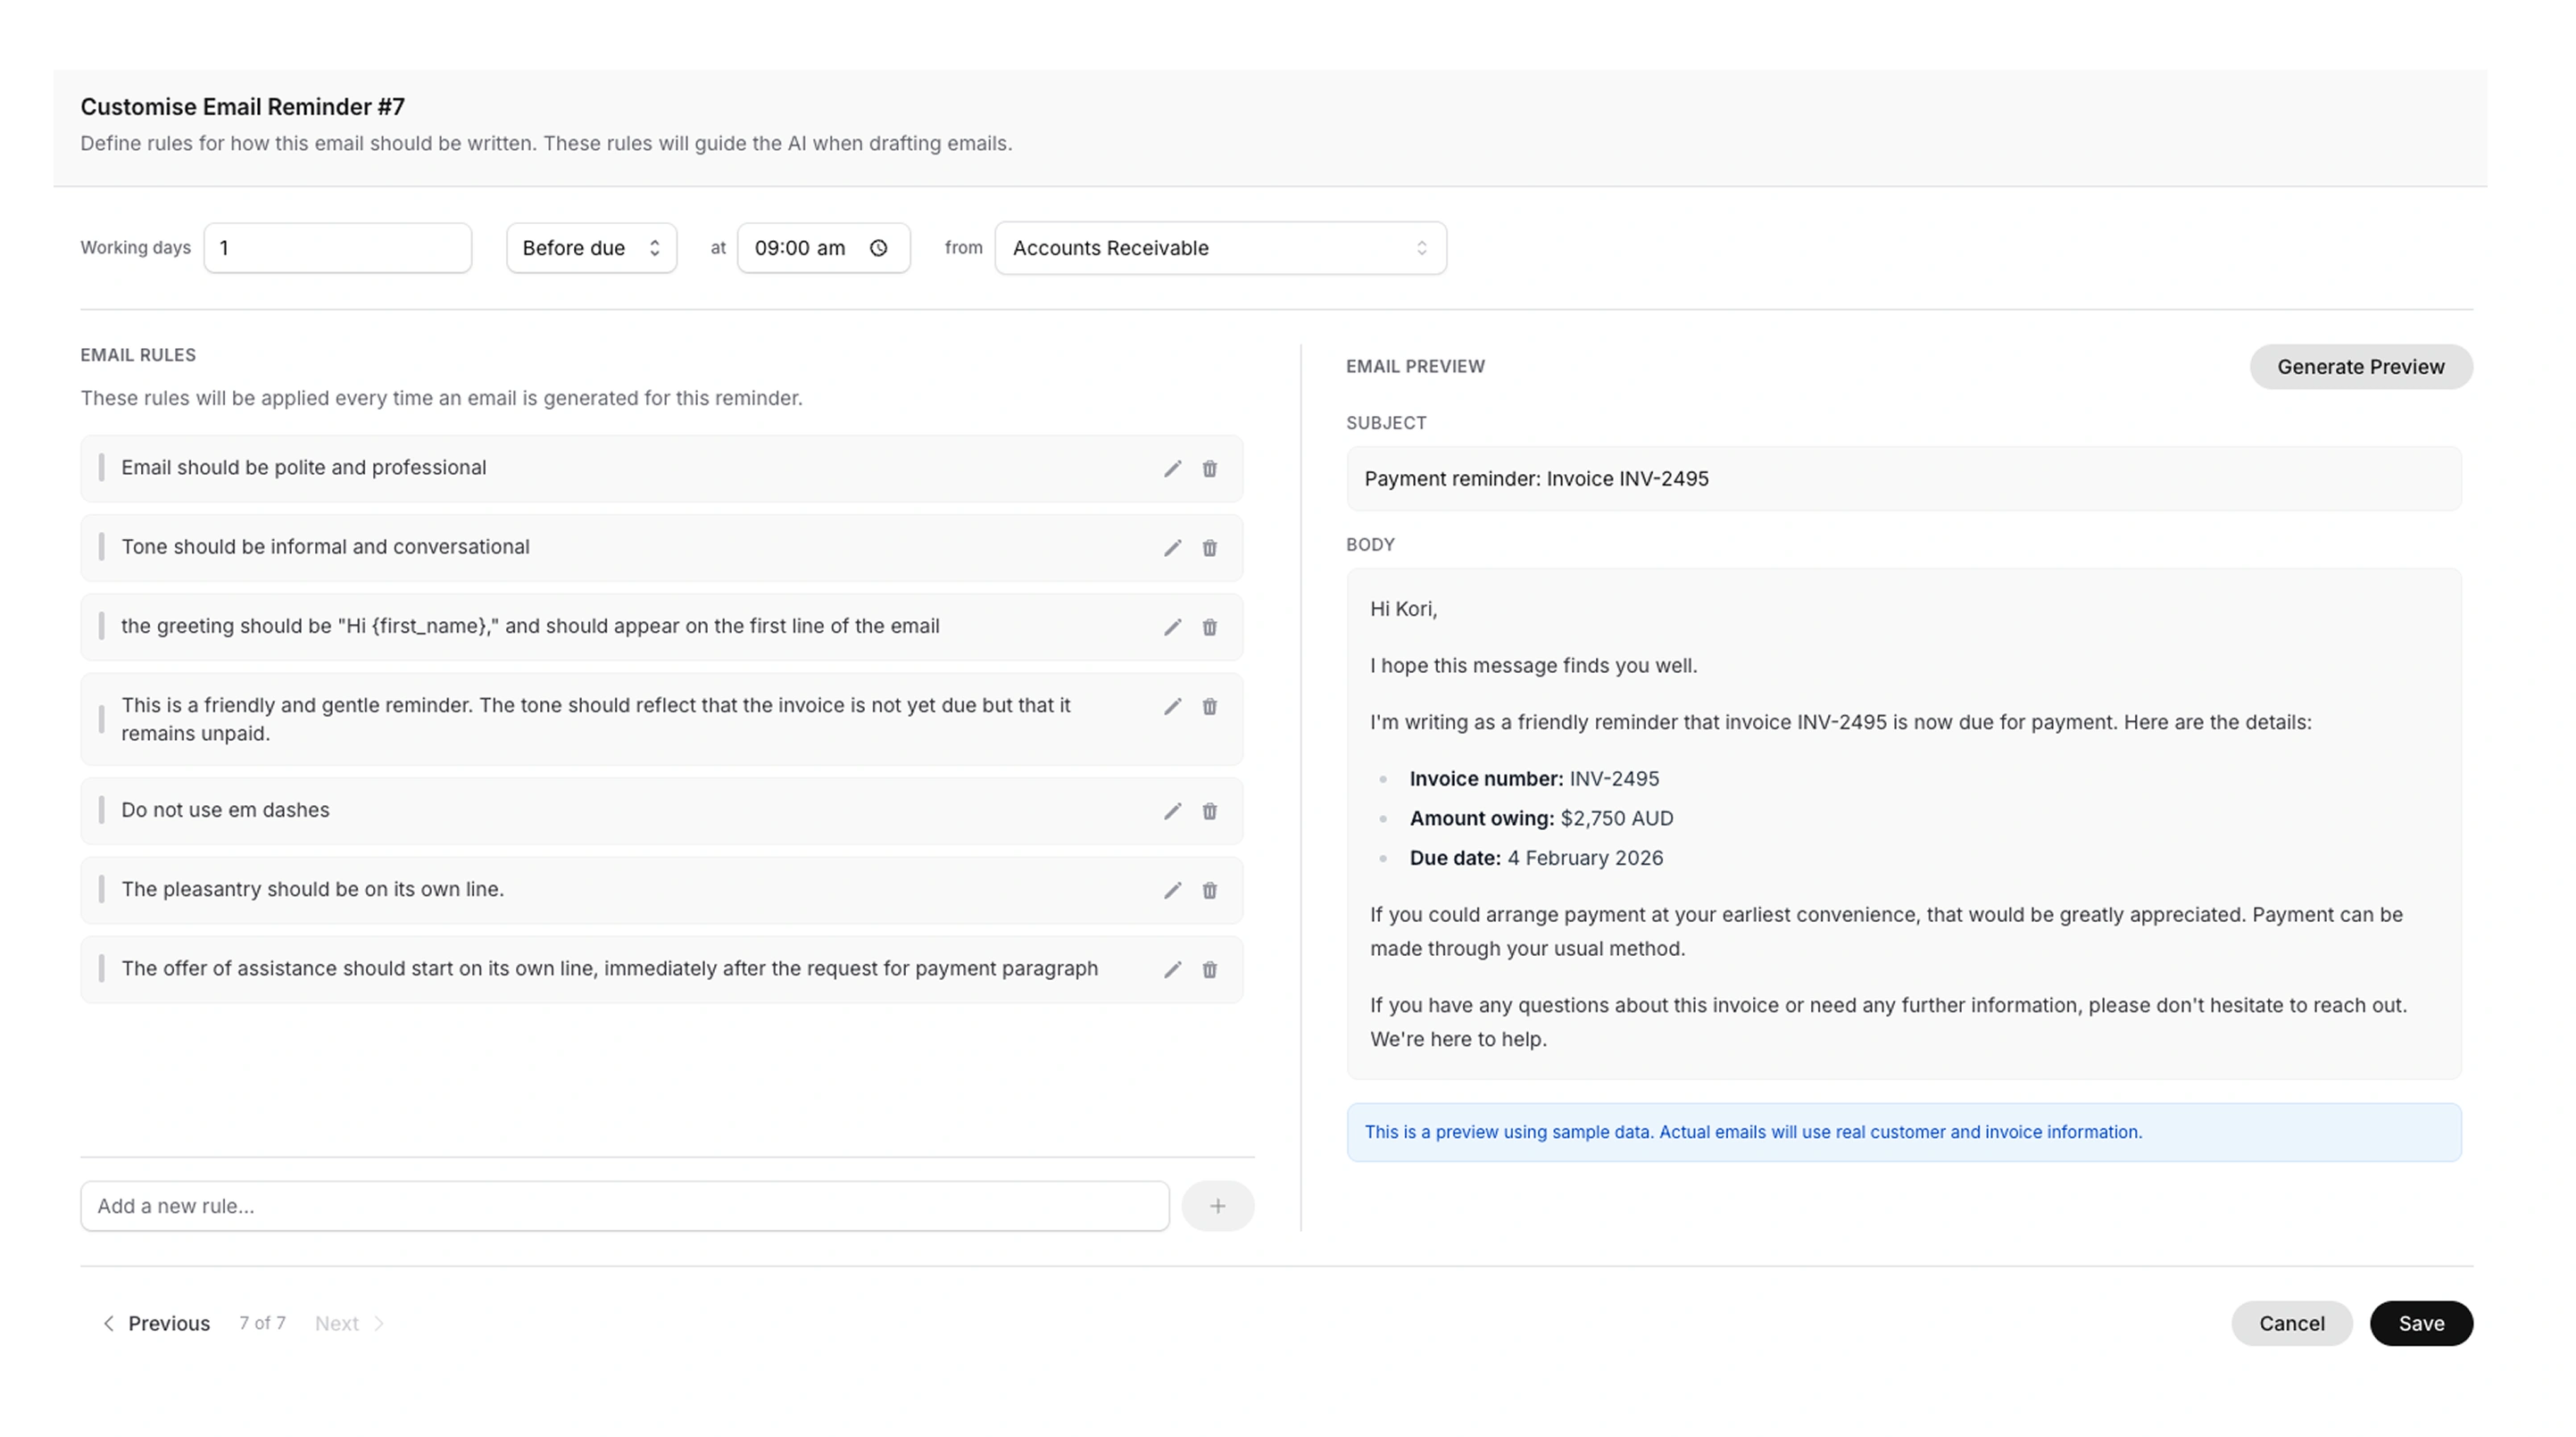
Setting Your Email Rules
The Email Rules will apply each time an email is generated for that particular reminder.
Use the Email Rules to specify the structure, tone, and contents of the email. Some examples of Email Rules rules are:
- "Keep it brief and friendly. This is just a cortesy email that the invoice is coming due."
- "Be polite but direct. Mention that this is a reminder and the invoice is now overdue."
- "More formal tone. Note that this is the second reminder and request prompt payment."
- "Firm but professional. Mention that we may need to pause services if payment isn't received soon."
- "Thank them for their business"
- "Friendly but clear. Acknowledge the invoice is slightly overdue. Assume they may have missed it. Offer to help if there are any questions."
- "Professional tone. Note this is a follow-up and the invoice is now a overdue. Request payment at their earliest convenience."
- "Request prompt attention. Ask them to get in touch if there's an issue preventing payment."
- "Professional and welcoming. Briefly mention we're following up on the invoice. Offer to answer any questions about our payment process."
- "Firm but professional. Note this is an urgent matter. Request they contact us immediately to discuss payment arrangements."
You can be as specific or general as you like. Some things you might include:
- Tone (friendly, professional, formal, firm)
- Length (brief, detailed)
- What to emphasise
- Specific phrases to include or avoid
- How direct to be about requesting payment
- Whether to mention it's a first, second, or final reminder
- Whether to include a threat of escalation or cessation of services
Example Email Reminder Sequence
Here's an example of how you might set up a 4-stage reminder sequence:
Reminder 1: Friendly heads-up
5 days before due · 9:00 AM · accounts@yourcompany.com · "Friendly and brief. Just a courtesy reminder that the invoice will be due soon. Keep it light."
Reminder 2: Due today
Due date · 10:00 AM · accounts@yourcompany.com · "Polite and straightforward. Let them know the invoice is due today and include payment details."
Reminder 3: First overdue
5 days after due · 9:00 AM · accounts@yourcompany.com · "Professional but clear that the invoice is now overdue. Request payment at their earliest convenience."
Reminder 4: Second overdue
10 days after due · 9:00 AM · manager@yourcompany.com (escalated sender) · "More direct tone. This is a second reminder. The invoice is now overdue. Request prompt attention to this matter."
Deleting Reminders
- Go to Settings → Reminder Rules
- Click Archive next to the Email Reminder you would like to delete
- Click Archive when asked to confirm
- Clock Save
Team Management
You can invite team members to collaborate in your Solido Workspace.
Roles
| Role | Permissions |
|---|---|
| Owner | Full access to all features, settings, billing, and team management |
| Administrator | Full access to all features, settings, and team management. Cannot manage billing or subscription. |
| Viewer | Can view dashboard, invoices, and contacts. Can send emails. Cannot change settings or manage billing. |
The account creator is automatically assigned the role of Owner. Each account may only have one Owner, but can have multiple Administrators and Viewers.
Inviting Team Members
- Go to Settings → Team
- Click Invite Team Member
- Enter your colleague's email address
- Select their role (Owner, Administrator, or Viewer)
- Click Send Invitation
The invitee will receive an email with a link to join your workspace. If they don't have a Solido account, they'll be prompted to create one.
Managing Team Members
To view your team go to Settings → Team. There, you will be able to view all current members and pending invitations.
Changing a Team Member's Role
- Go to Settings → Team
- Click the menu icon (⋮) next to the member
- Click Change Role
- Select their new role
- Click Save
Removing a Team Member
- Go to Settings → Team
- Click the menu icon (⋮) next to the member
- Click Remove from Workspace
- Confirm the removal
Removed members lose access immediately but can be re-invited later.
Pending Invitations
To cancel a pending invitation:
- Go to Settings → Team
- Find the pending invitation
- Click Cancel Invitation
Connecting Team Mailboxes
Each team member can connect their own email mailbox. This allows reminders to be sent from different people's addresses.
To do so:
- The team member logs in to Solido
- They go to Settings → Email Mailboxes
- They click Add Mailbox and connect their account
Once connected, their mailbox can be assigned to reminder rules.
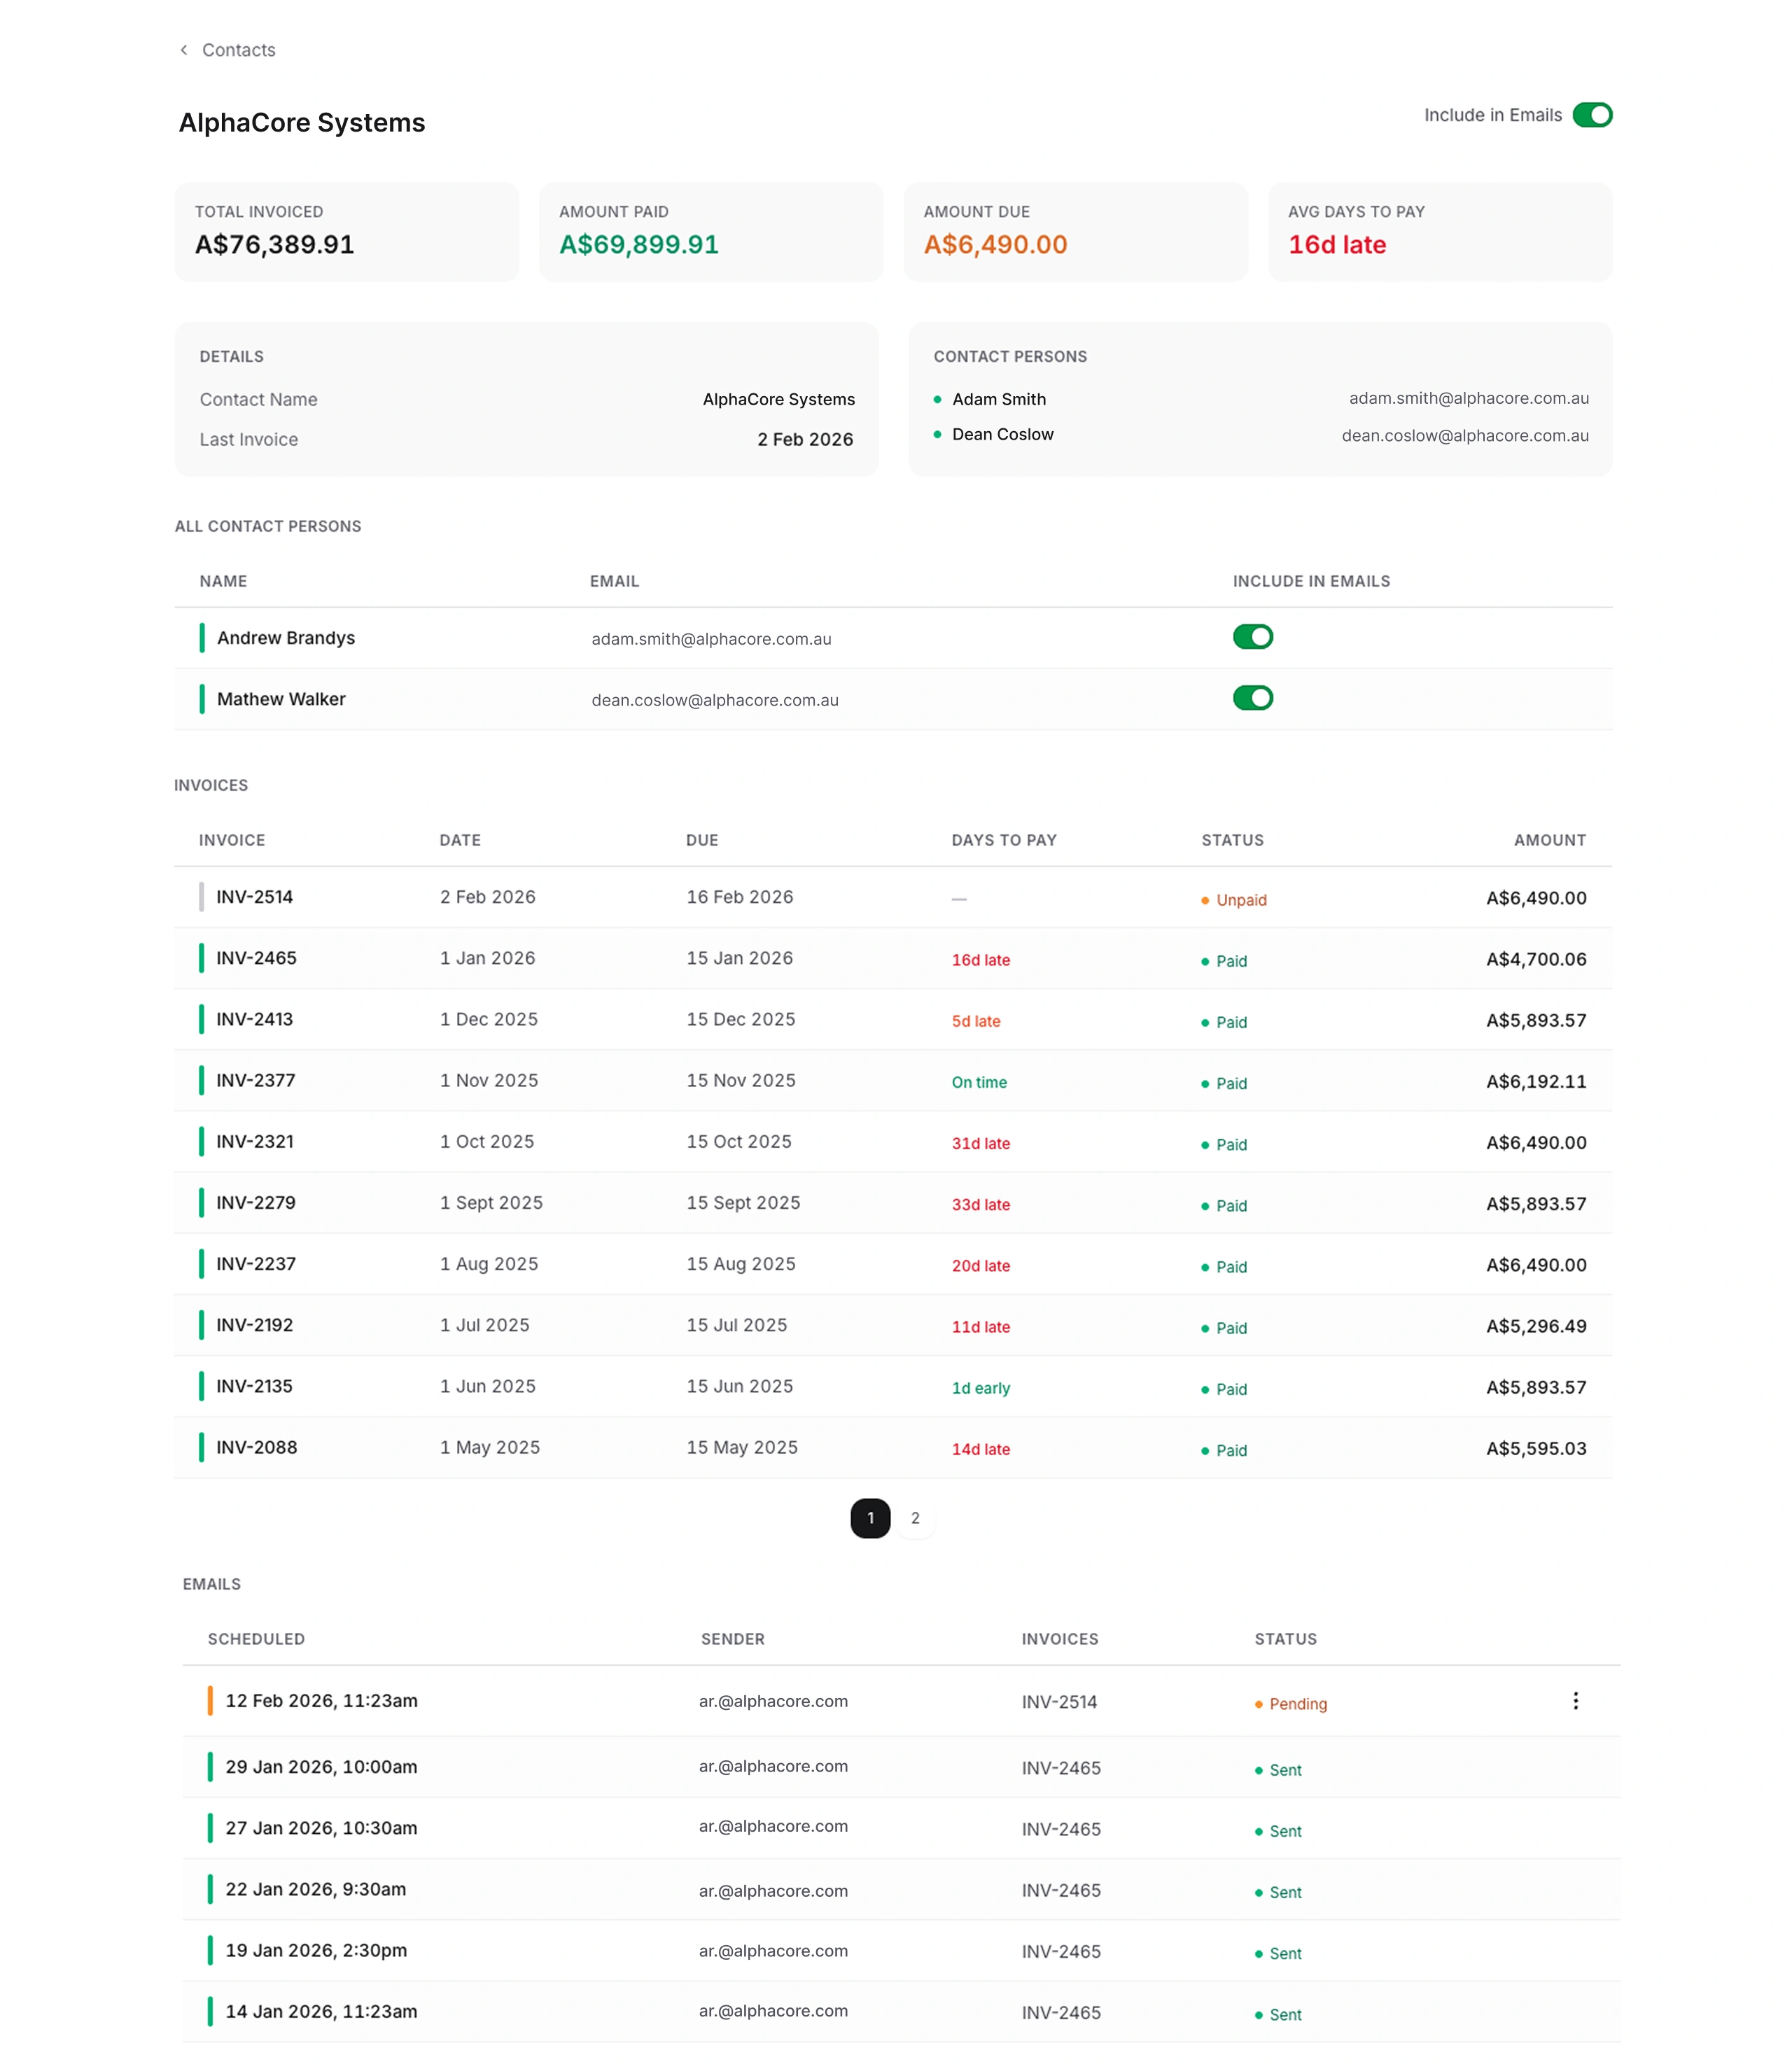
Managing Contacts
Customers and their contacts sync automatically from Xero. You can control which customers are included in email reminders and which contacts at each customer receive them.
Viewing Contacts
- Click Contacts in the navigation bar
- Browse or search for contacts
- Click on a contact to view their details
Including or Excluding a Customer from Reminders
Each customer has a toggle to include or exclude them from email reminders.
To include a customer:
- Go to Contacts
- Click on the relevant Customer
- Use the toggle in the top right hand corner to include the customer in email reminders
When turned on, Solido will generate and send email reminders to the nominated contacts for that customer's unpaid invoices.
To exclude a customer:
- Go to Contacts
- Click on the relevant Customer
- Use the toggle in the top right hand corner to turn off email reminders for the nominated customer.
When you choose not to include a customer in email reminders, Solido will not generate email reminders for that customer. You may choose to do this for key relationships you'd rather manage personally, or customers where automated reminders aren't appropriate.
Managing Contacts Within a Customer
Each customer page lists the contacts for that customer (synced from Xero). You can toggle individual contacts on or off to control who is included in reminder emails.
To include a contact:
- Go to Contacts
- Click on the relevant Customer
- Find the contact in the contact persons list
- Toggle that contact on to include in emails
That contact will be included as a recipient when Solido sends reminders for that customer's invoices.
To exclude a contact:
- Go to Contacts
- Click on the relevant Customer
- Find the contact in the contact persons list
- Toggle that contact off to not include in emails
That contact will no longer receive reminder emails on behalf of the custimer.
This is useful when a customer has multiple contacts (e.g. accounts payable, a project manager, and a director) and you only want reminders sent to the relevant people.
Working with Invoices
Invoices sync automatically from Xero and update in real time.
Viewing Invoices
To view invoices, click Invoices in the main navigation pane.
You can:
- Filter invoices by status (paid, unpaid, void, deleted)
- Search by invoice number or customer name
- Sort by date (date issued or date due), days overdue, and amount

Viewing Invoice Details
To view the details of a particular invoice:
- Go to Invoices
- Select the invoice from the list
On the invoice's page, you will be able to see:
- Invoice number and date
- Invoice status (paid, unpaid, void, deleted)
- Invoice total
- Amount due
- Amount paid (if any)
- Due date
- Date paid
- Email reminders generated by Solido
When Invoices Are Paid
When an invoice is marked as paid in Xero:
- The status updates automatically in Solido
- Any pending scheduled reminders for that invoice are automatically cancelled
- No further reminders will be sent
Invoice Email History
For each invoice, you can see all reminder emails generated or sent via Solido, and the date they are scheduled (or have) sent.
Managing Emails
The Emails page shows all emails generated and sent through Solido. You can view, manage, and manually create emails from this page.
Viewing the Emails List
To view emails, click Emails in the main navigation pane. From there, you can see the list of all emails generated and sent from Solido. You can filter emails based on status (sent, pending, cancelled), search based on recipient name, and sort by:
- Contact
- Scheduled date
- Sender
- Status
You can also choose to cancel or send emails immediately from the Emails page. You can do this by:
- Clicking the menu icon (⋮) on the righthand side of the email you would like to send or cancel
- Selecting 'Send Now' to send the email immediately or 'Cancel' to cancel the email and stop it from sending
Managing Pending Emails
Pending emails are emails that have been generated and scheduled, but have not yet been sent. When an email is pending, you can:
- Review the email before it sends
- Send the email immediately
- Cancel the email
To do this:
- Select the email from the list that you would like to review to open the email details screen
- From the email details page, you can review:
- The email's scheduled send date
- The invoice(s) attached to the email
- The total amount due
- Email recipient
- Email sender
- The subject line and body of the email
- From there, you can choose to:
- Send the email immediately by clicking Send Now
- Cancel the email by clicking Cancel Email
- Do nothing and allow the email to send automatically as scheduled
Creating a Manual Email
You can manually prepare and send emails to customers about an invoice from Solido.
To do so:
- Click the + icon next to the Emails heading to open the New Email screen
- Choose a sender for the email from the connected mailboxes
- Choose a recipient from the Contact list
- If the Contact has invoices outstanding, you can select which ones to include in the email
- Enter the email subject
- Draft the email
- Schedule the email
- Click Create Email
The email will then appear in the Emails list and send at the scheduled time.
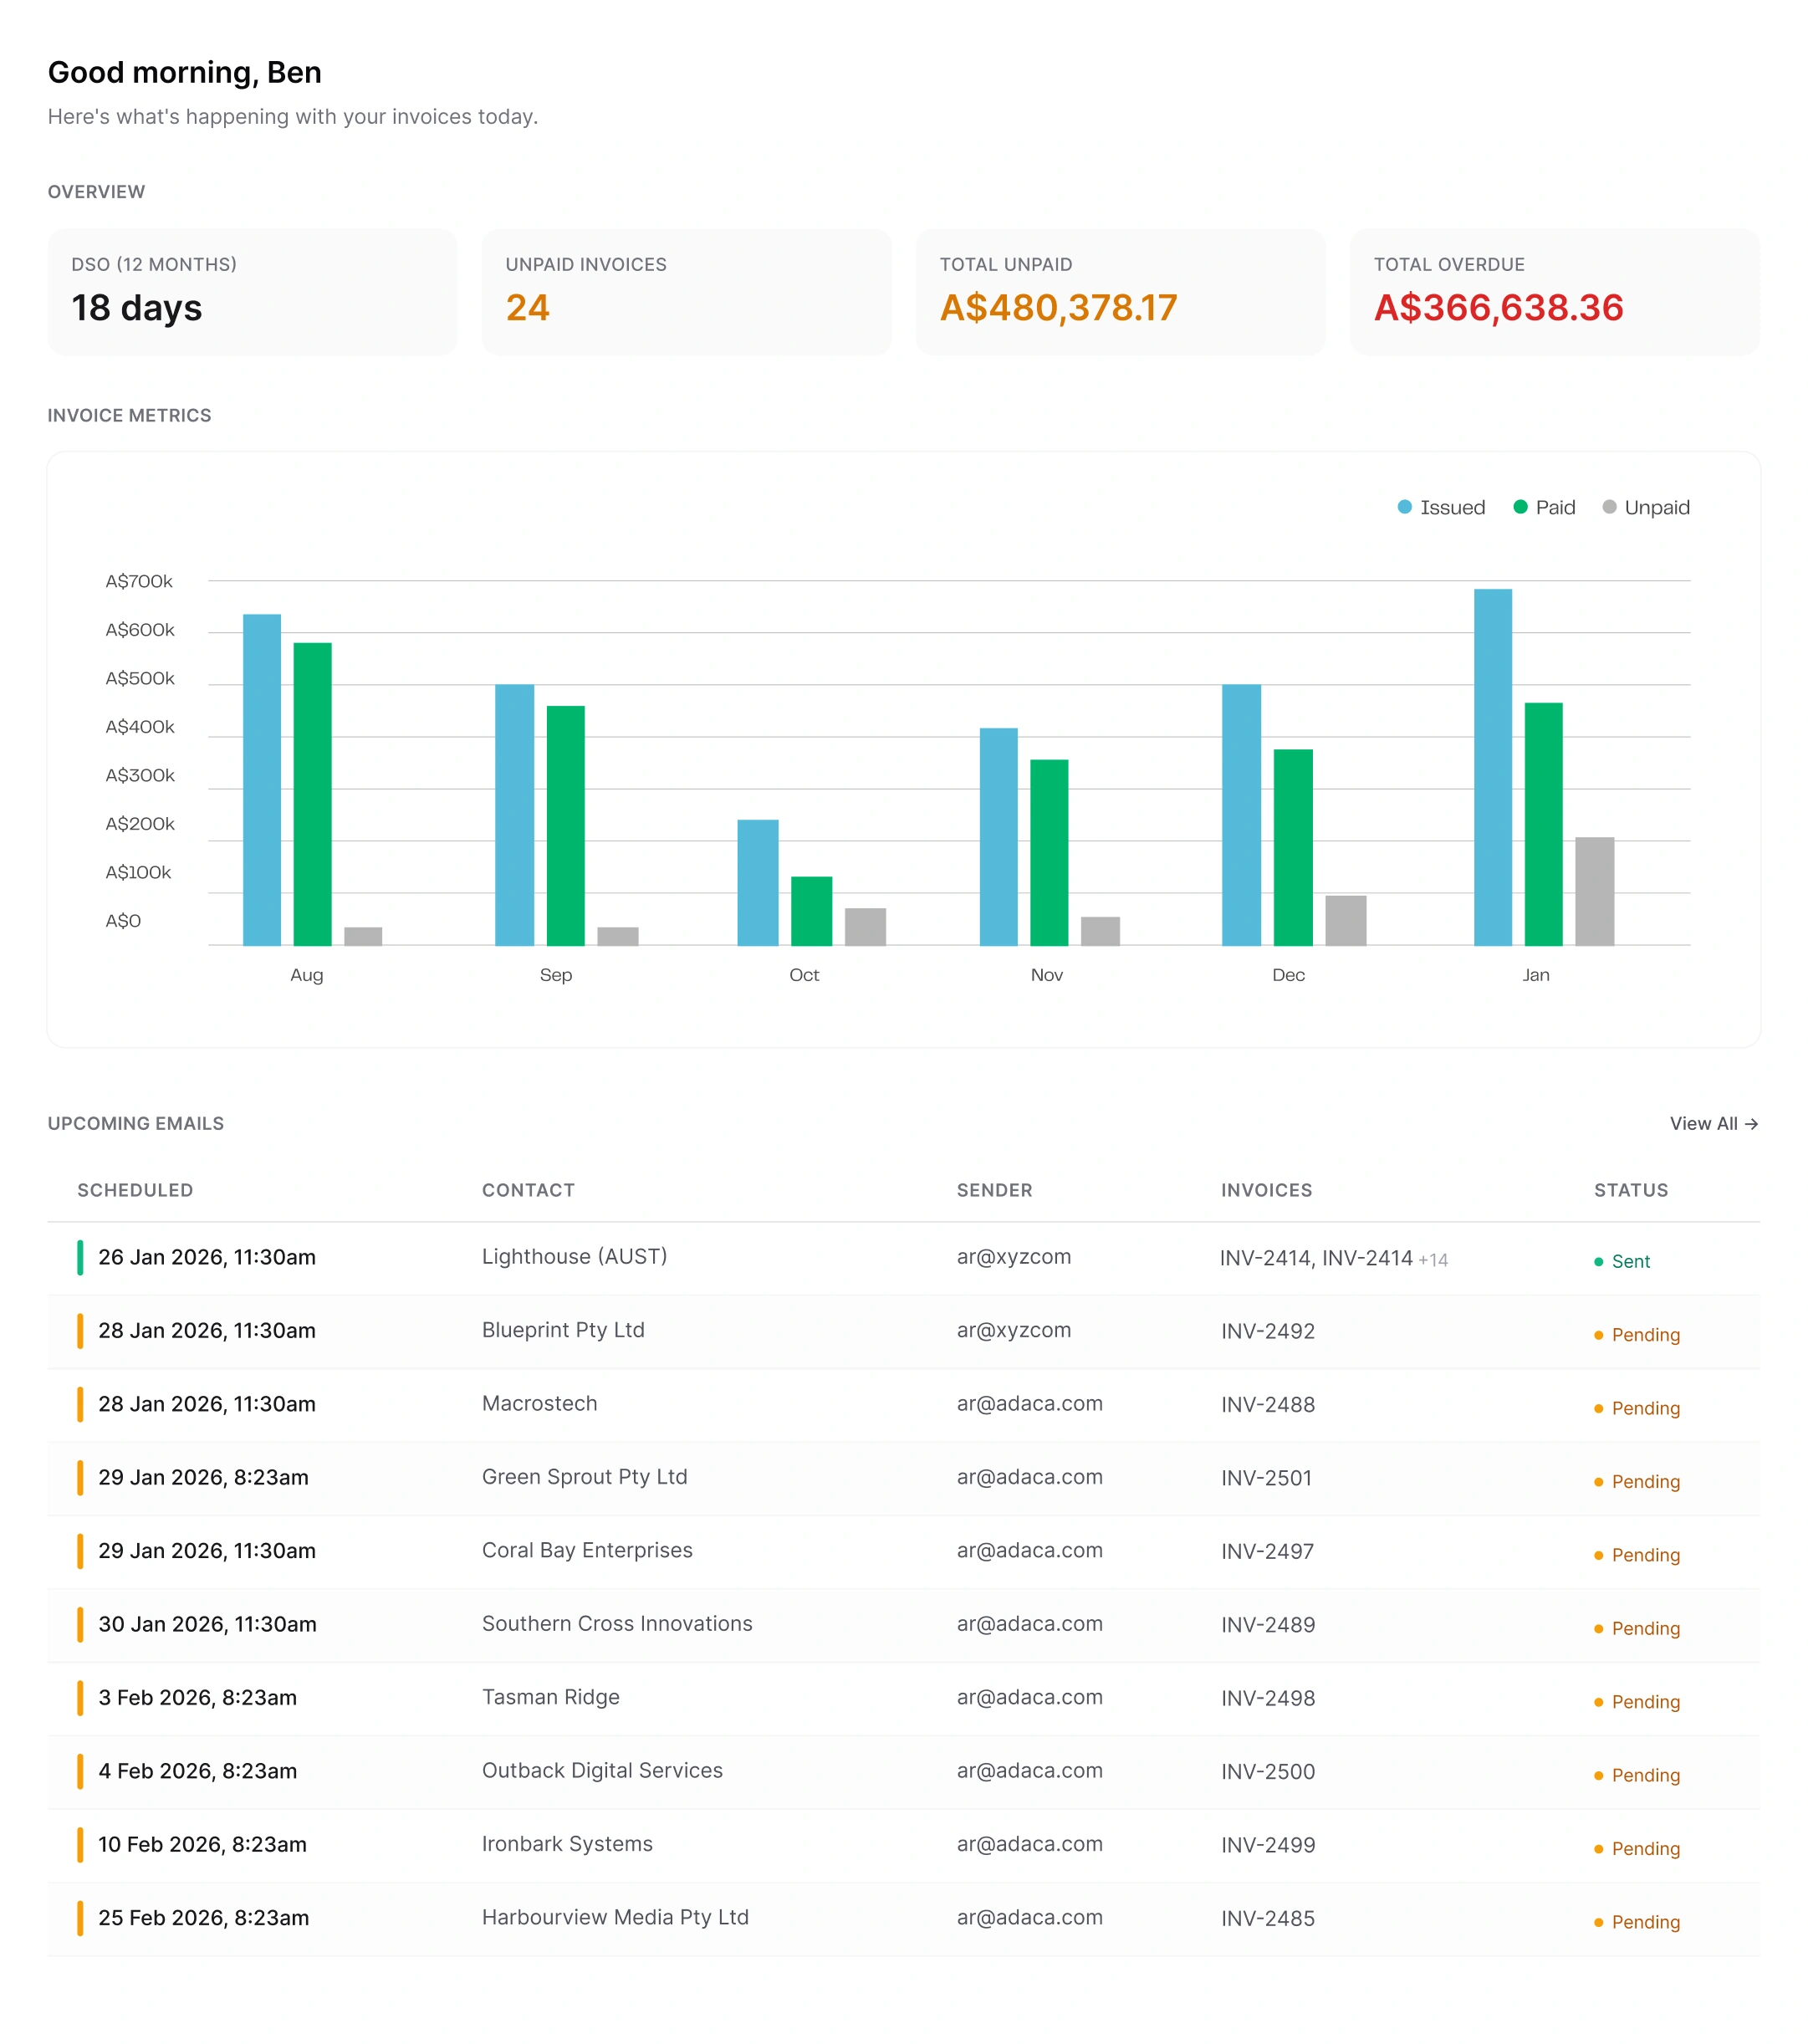
Dashboard & Reporting
Dashboard Overview
The dashboard gives you a snapshot or your receivables. Key metrics available are:
- Days Sales Outstanding (DSO), being your average collection period
- Total Unpaid, being the total value of all outstanding invoices
- Total Overdue, being the total value of all overdue invoices
In addition, you can see:
- The number of invoices issued, paid, and unpaid on a per month basis
- Upcoming emails scheduled to be sent
- Preview upcoming emails
Troubleshooting
Common Issues
Xero sync not working
- Check your connection in Settings → Integrations
- Try clicking Sync
- If the problem persists, disconnect and reconnect Xero
Emails not sending
- Check that your mailbox is connected in Settings → Email Mailboxes
- Check that reminder rules have been set in Settings → Email Reminders
- Check that the customer has email reminders toggled on by going to Contacts and select the relevant contact
- Check that at least one contact is toggled on within the customer
- Review the scheduled emails on the Emails page
Customer not receiving reminders
- Check that the customer has email reminders toggled on by going to Contacts and select the relevant contact
- Check that at least one contact is toggled on within the customer
- Verify there are unpaid invoices for that customer by going to Contacts and selecting the relevant contact
- Check reminder rules are configured and active in Settings → Email Reminders
Wrong time zone for emails
Update your workspace timezone in Settings → General Settings.
Getting Help
Email support: support@solido.ai
When contacting support, please include:
- Your workspace name
- A description of the issue
- Any error messages you've seen
- Steps to reproduce the problem
FAQs
How do I disconnect from Xero?
Go to Settings → Integrations and click Disconnect next to Xero. Your existing data in Solido will be retained, but invoices and payment statuses will no longer sync.
Can I connect multiple Xero organisations?
Each workspace connects to one Xero organisation. If you have multiple Xero organisations (e.g. for different businesses), you can create separate workspaces for each. You will need to select a plan per workspace.
What happens if my Xero connection expires?
Xero tokens can expire if not used for an extended period. If this happens, go to Settings → Integrations and click Connect Xero. You'll be prompted to sign in to Xero again.
Can I connect more than one email account?
Yes. Go to Settings → Email Mailboxes to click Add Mailbox to add additional mailboxes. This is useful if you want different reminder stages to come from different people.
What data does Solido access from Xero?
Solido accesses your invoices (including amounts, due dates, and status), contacts (names and email addresses), and payment status updates. Solido does not access bank accounts, bills, payroll, or other Xero data.
Does Solido write anything back to Xero?
No. Solido is a read-only integration. It does not create, edit, or delete any data in Xero. All invoice and payment management continues in Xero as normal.
How often does data sync from Xero?
Invoices and contacts sync automatically once your accounts have been connected. Solido syncs automatically throughout the day, so when an invoice is marked as paid in Xero, this is reflected in Solido and Solido will stop sending reminders for that invoice immediately.
What happens if sync fails?
If a sync fails, you'll see an error message in Settings → Sync Status. Click Settings → Integrations to try again. If the problem persists, try disconnecting and reconnecting Xero.
Does Solido sync historical invoices?
Yes. When you first connect Xero, Solido syncs your existing invoices, including historical data.
How does Solido generate emails?
You configure rules for each reminder stage (tone, style, what to emphasise). Solido uses these rules to generate appropriate emails. Invoice details like amount, due date, and invoice number are included automatically.
Can clients reply to reminder emails?
Yes. Emails are sent from your connected Microsoft 365 or Google Workspace account. Replies go directly to your inbox.
Do emails appear in my Sent folder?
Yes. Because emails are sent through your email account, they appear in your Sent folder like any other email you've sent.
What happens when an invoice is paid?
When an invoice is marked as paid in Xero, Solido receives the update and automatically cancels any pending reminders for that invoice. No further reminders will be sent.
Can I stop reminders for a specific client?
Yes. Go to the customer's page and toggle email reminders off. Solido will stop generating reminders for that customer. You can also toggle individual contacts on or off within a customer to control who receives emails.
Can I preview emails before they're sent?
You can view scheduled emails on the Dashboard under Upcoming Emails. You can cancel individual emails if needed.
What payment methods do you accept?
We accept major credit cards via Stripe.
Can I change plans?
Yes. Go to Settings → Subscription and click Change Plan. Upgrades take effect immediately; downgrades take effect at the start of your next billing period.
What happens if I cancel?
You retain full access until the end of your current billing period. After that, automated emails stop sending, email generation stops, and data stops syncing from Xero. Your data is preserved, and you can resubscribe anytime.
Is my data secure?
Solido uses secure OAuth connections to Xero and your email provider. We don't store your Xero or email passwords. All data is encrypted in transit and at rest.
Who can see my data?
Only users you invite to your workspace can see your data. Each workspace is isolated from others.